The update process of Purchase Planning is as follows:
Navigation: Menu > Purchase Planning App > Purchase Plan Listview > Edit (Pencil Icon)
The update process of Purchase Planning is as follows:
Navigation: Menu > Purchase Planning App > Purchase Plan Listview > Edit (Pencil Icon)
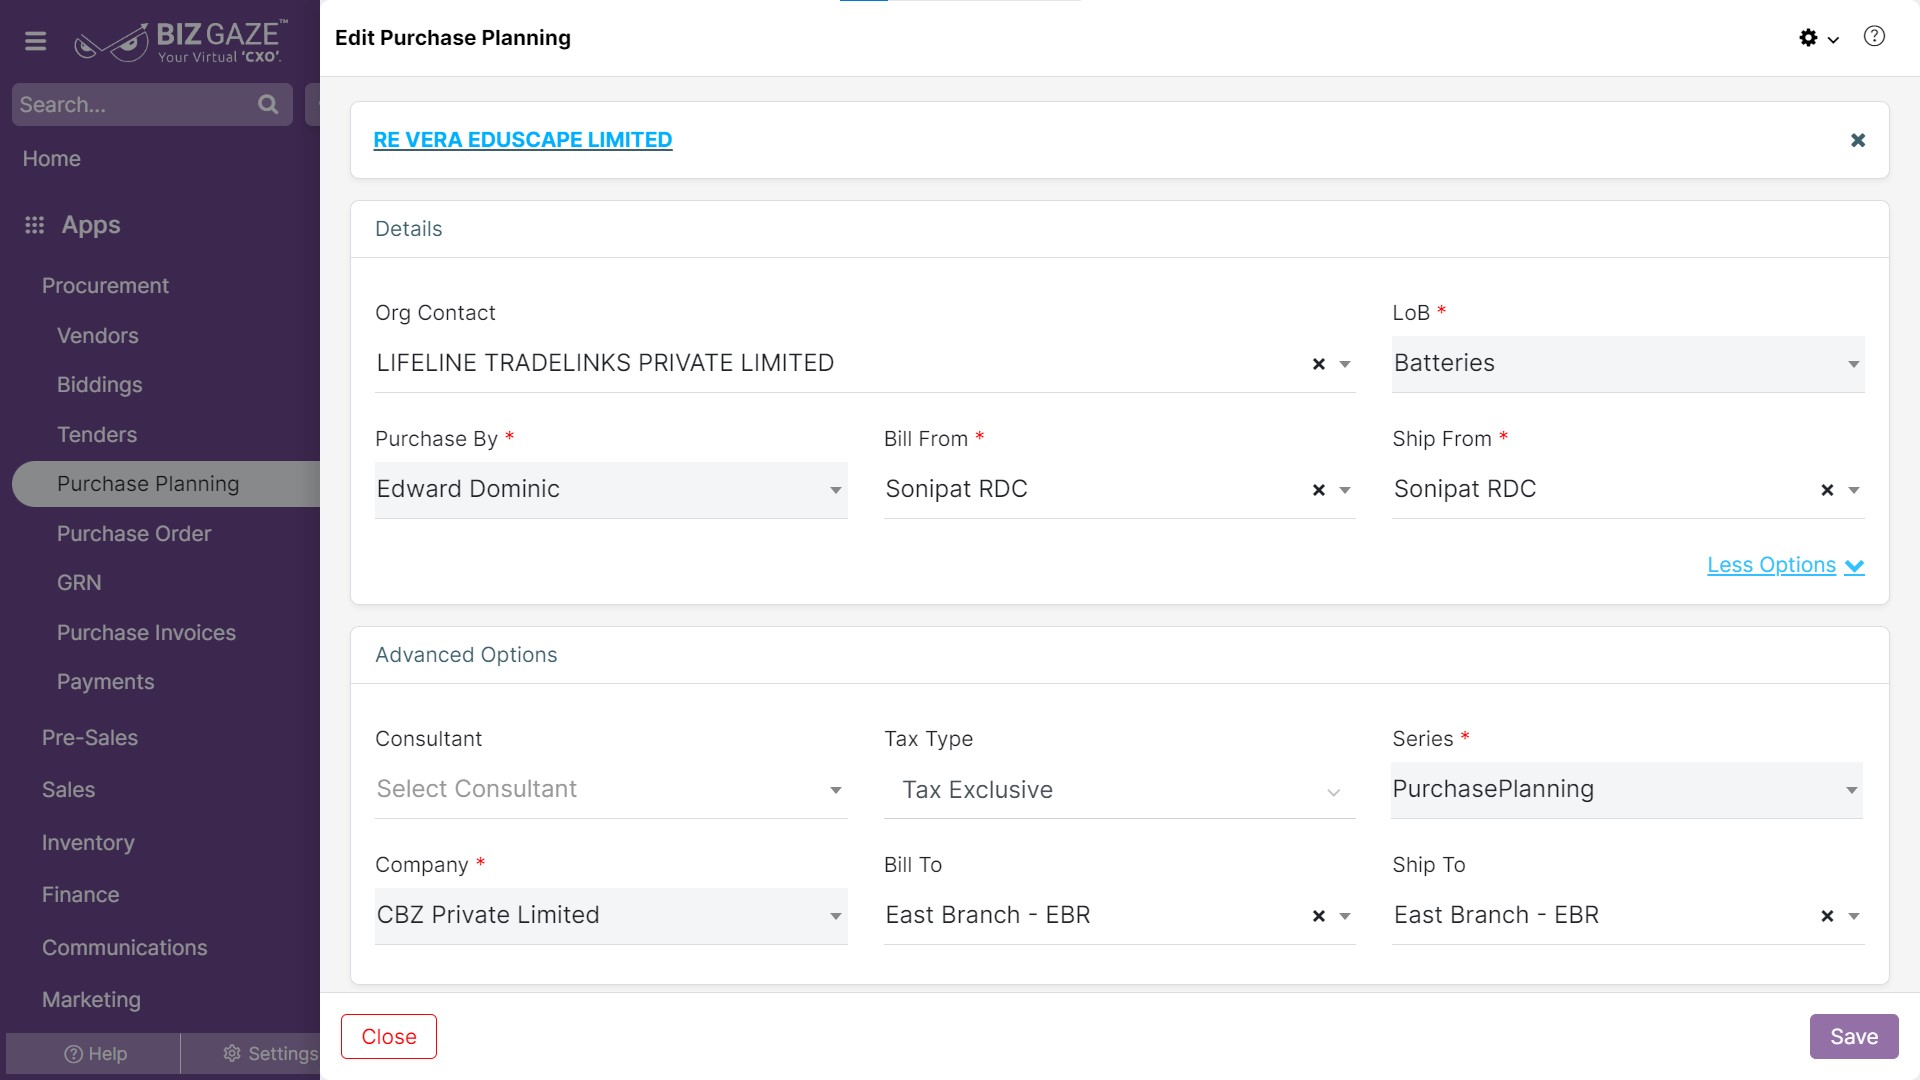
If user wants to update the already existing Purchase Planning details, user needs to click on ‘Edit’ option at the top right corner and fill in the required details.
Edit Purchase Planning
| Field name | Description |
| Organization | The system automatically shows organization name and if user wants to change organization name, click on the (x) option and select a new organization name from the list |
| Details | |
| Org Contact | By default system shows contact person name of the Organization and if user wants to change it, select new contact person name from the list |
| LoB | By default system loads LoB segment of the organization and if user wants to change it, select a LoB name from the list |
| Sales Person | By default system shows Sales person name assigned and if user wants to change it, select a new manager name from the list |
| Field name | Description |
| Bill From | By default the system shows the Bill From address of the company and if user wants to change it, select a new address name from the list |
| Ship From | By default system shows Ship From address of the company and if user wants to change it, select a new address name from the list |
| Advanced Options | |
| Consultant | By default system shows the name of the Consultant assigned and if user wants to change the it, select a new consultant name from the list |
| Tax type | By default the system shows the Tax type allotted for the purchase plan, and if user wants to change it, select the Tax type from the list |
| Series | By default the system takes series as Purchase Planning |
| Company Name | The system automatically loads company name by default |
| Bill To | By default the system shows the Bill To address of the customer and if user wants to change the address, select a address name from the list |
| Ship To | By default system shows Ship To address of the customer and if user wants to change the address, select a address name from the list |
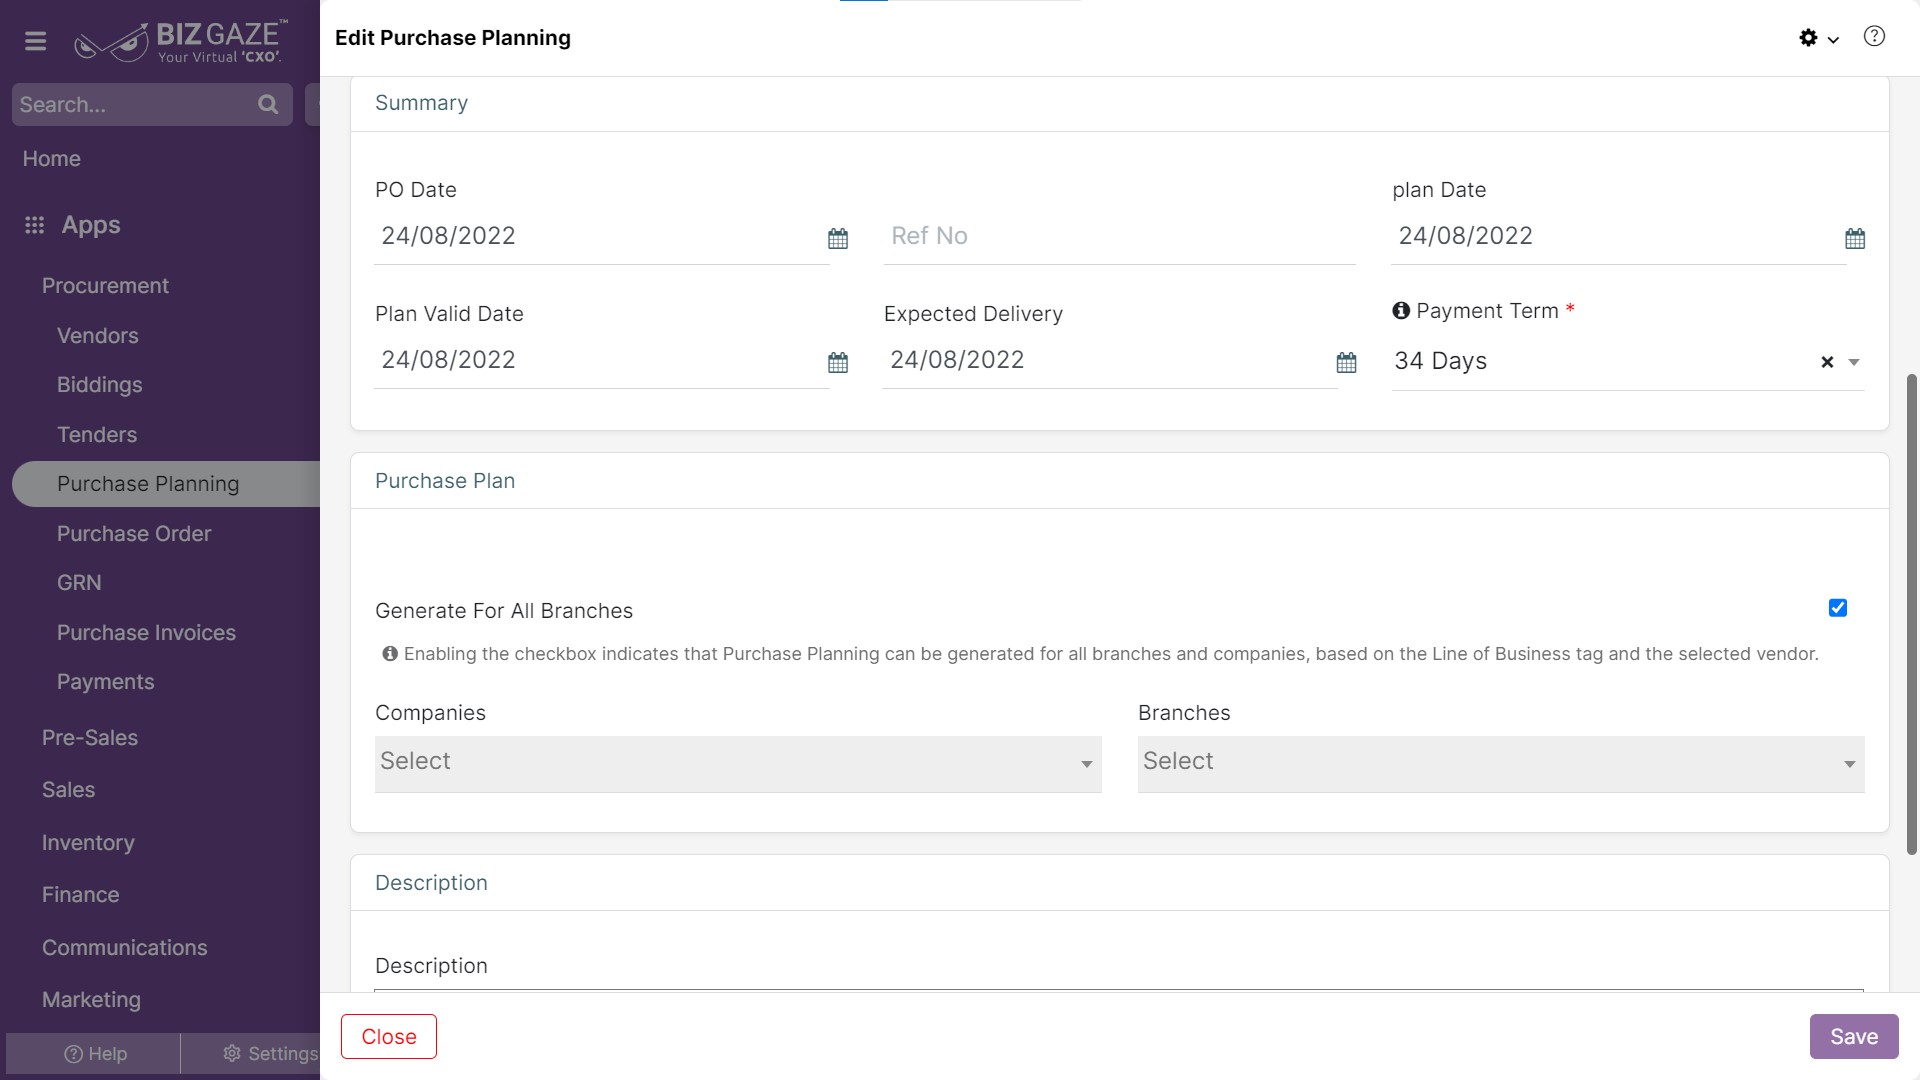
User can also update the Plan Valid Date, Expected Delivery Date and Payment Term in this section.
| Field name | Description |
| Summary | |
| PO Date | The system automatically shows the PO (Purchase Order) date, and if user wants to change it, set a new date from the calendar |
| Ref No. | By default system shows Reference number of the purchase plan and if user wants to change it, enter a new reference number |
| Expected Delivery Date | System automatically shows Delivery date of the Purchase plan and if user wants to change it, set a new date from the calendar to apply |
| Plan Date | System automatically loads the Purchase plan creation date as when it is generated and if user wants to change it, set a new date from the calendar |
| Plan Valid Date | System automatically shows the Purchase plan expiry date, if user wants to change it, set an expiry date from the calendar |
| Payment Term | By default system shows Payment Term allotted for the purchase plan and if user wants to change it, select a new Payment Term from the list |
| Generate Purchase Plan | |
| Generate For All Branches | User can click on checkbox to Generate purchase plan for all the branches |
| In case the user not selecting the checkbox | |
| Company Name | Select company name to generate purchase plan for the particular company |
| Branch Name | Select branch name from the list to generate purchase plan for a particular branch |
| Description | User can comment or enter short notes about the Purchase Planning |
Updates in Details Portlet
The process to Edit Purchase plan items is as follows
Navigation: Menu > Purchase Planning App > Listview > Select the Purchase Plan > Details Portlet > Purchase Plan Items Widget > Edit (Three dots)
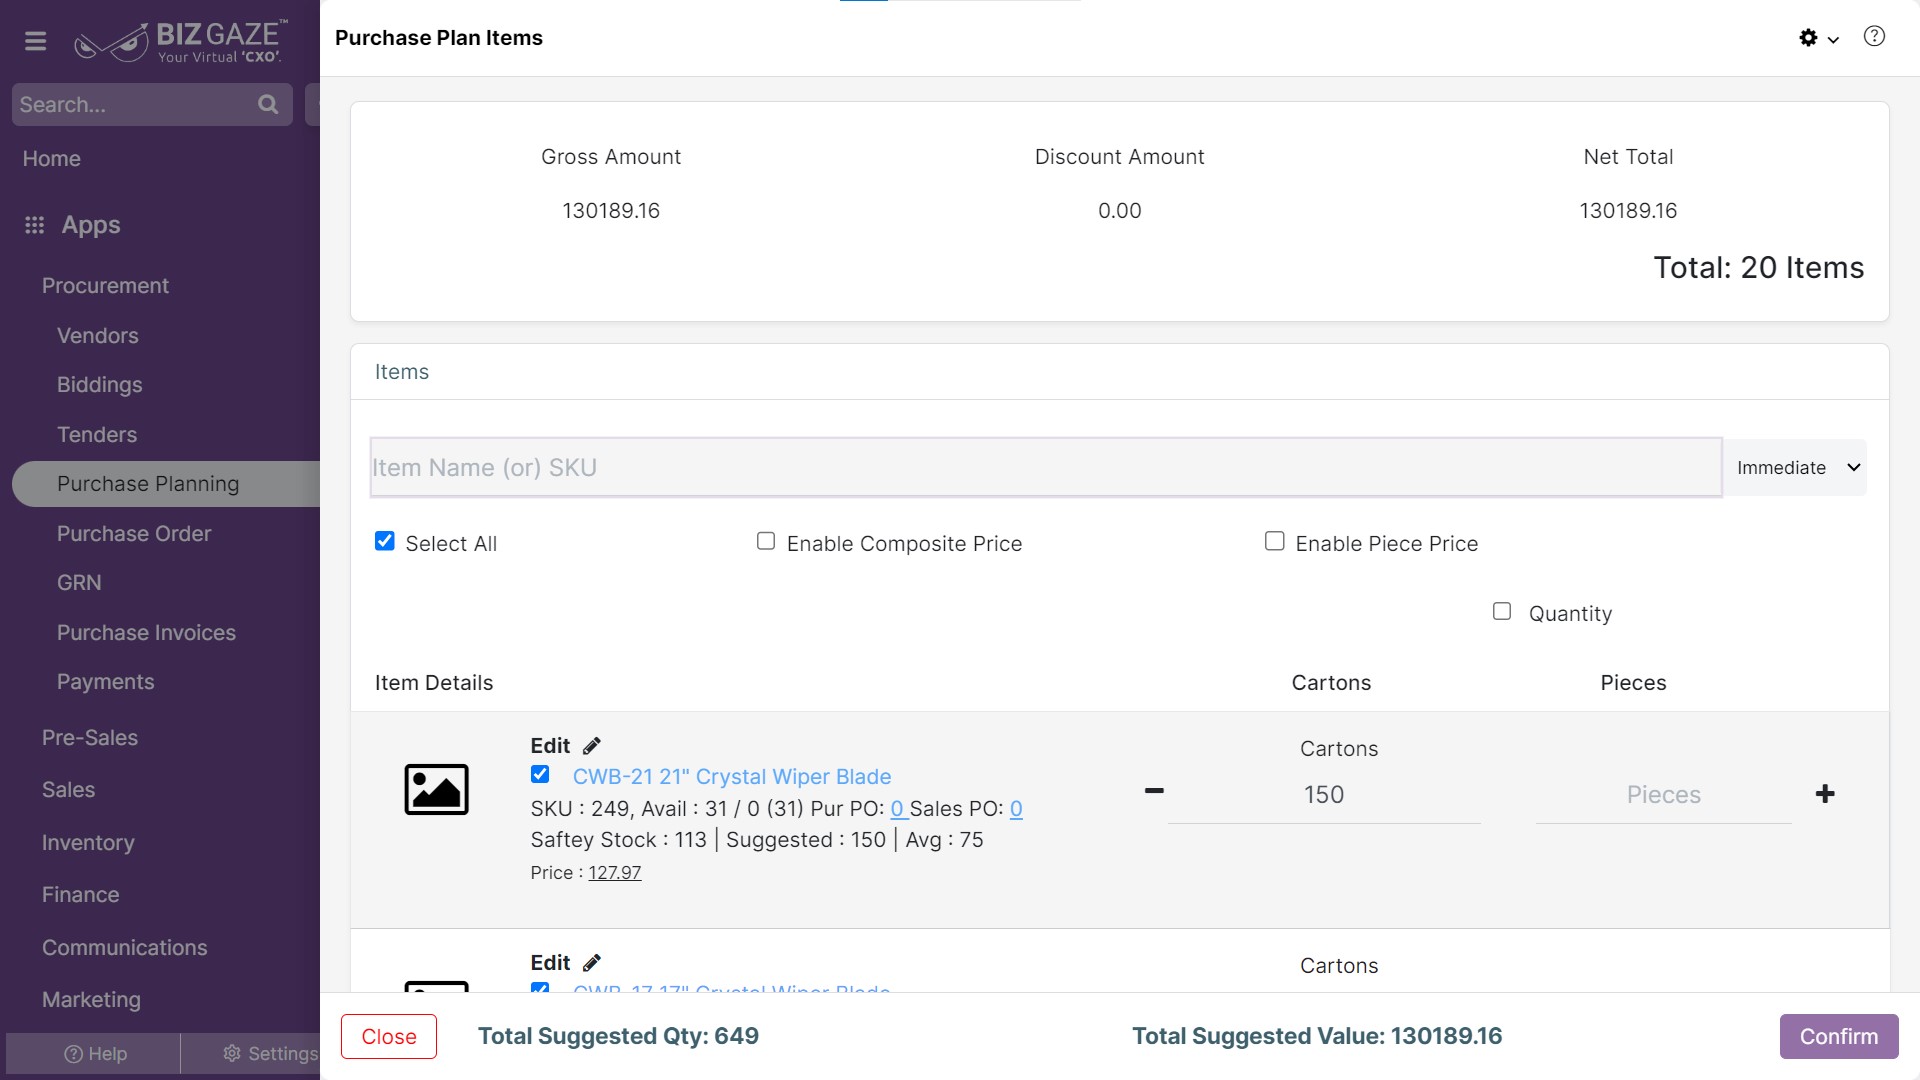
By default the system displays Items details of the Purchase Plan and if user wants to update existing Purchase Plan Item details, click on Edit (Three dots) option to the right corner of Items Widget and apply the changes required
Purchase Plan Items
| Field name | Description |
| Gross Amount | Gross Amount refers to the total amount of money or value of a transaction before any deductions or expenses are taken into account. It includes all charges, fees, taxes, and other costs associated with the transaction. |
| Discount | Total Discount value given on the item. The “Discount on Items” value is loaded automatically. |
| Net Total | Net Total refers to the final amount that remains after all deductions, discounts, taxes, and other charges have been subtracted from the Gross Amount. It is the actual amount that a customer is required to pay for a product |
| Items | |
| Search | User can search for a specific term by entering the item name or SKU |
| Select All | User can select all the items by clicking on the checkbox |
| Quantity | System automatically shows Quantity of the claim items and if user wants to change it, enter a new quantity in number or click on ‘+’ or ‘-’ to increase or decrease quantity respectively to the current quantity |
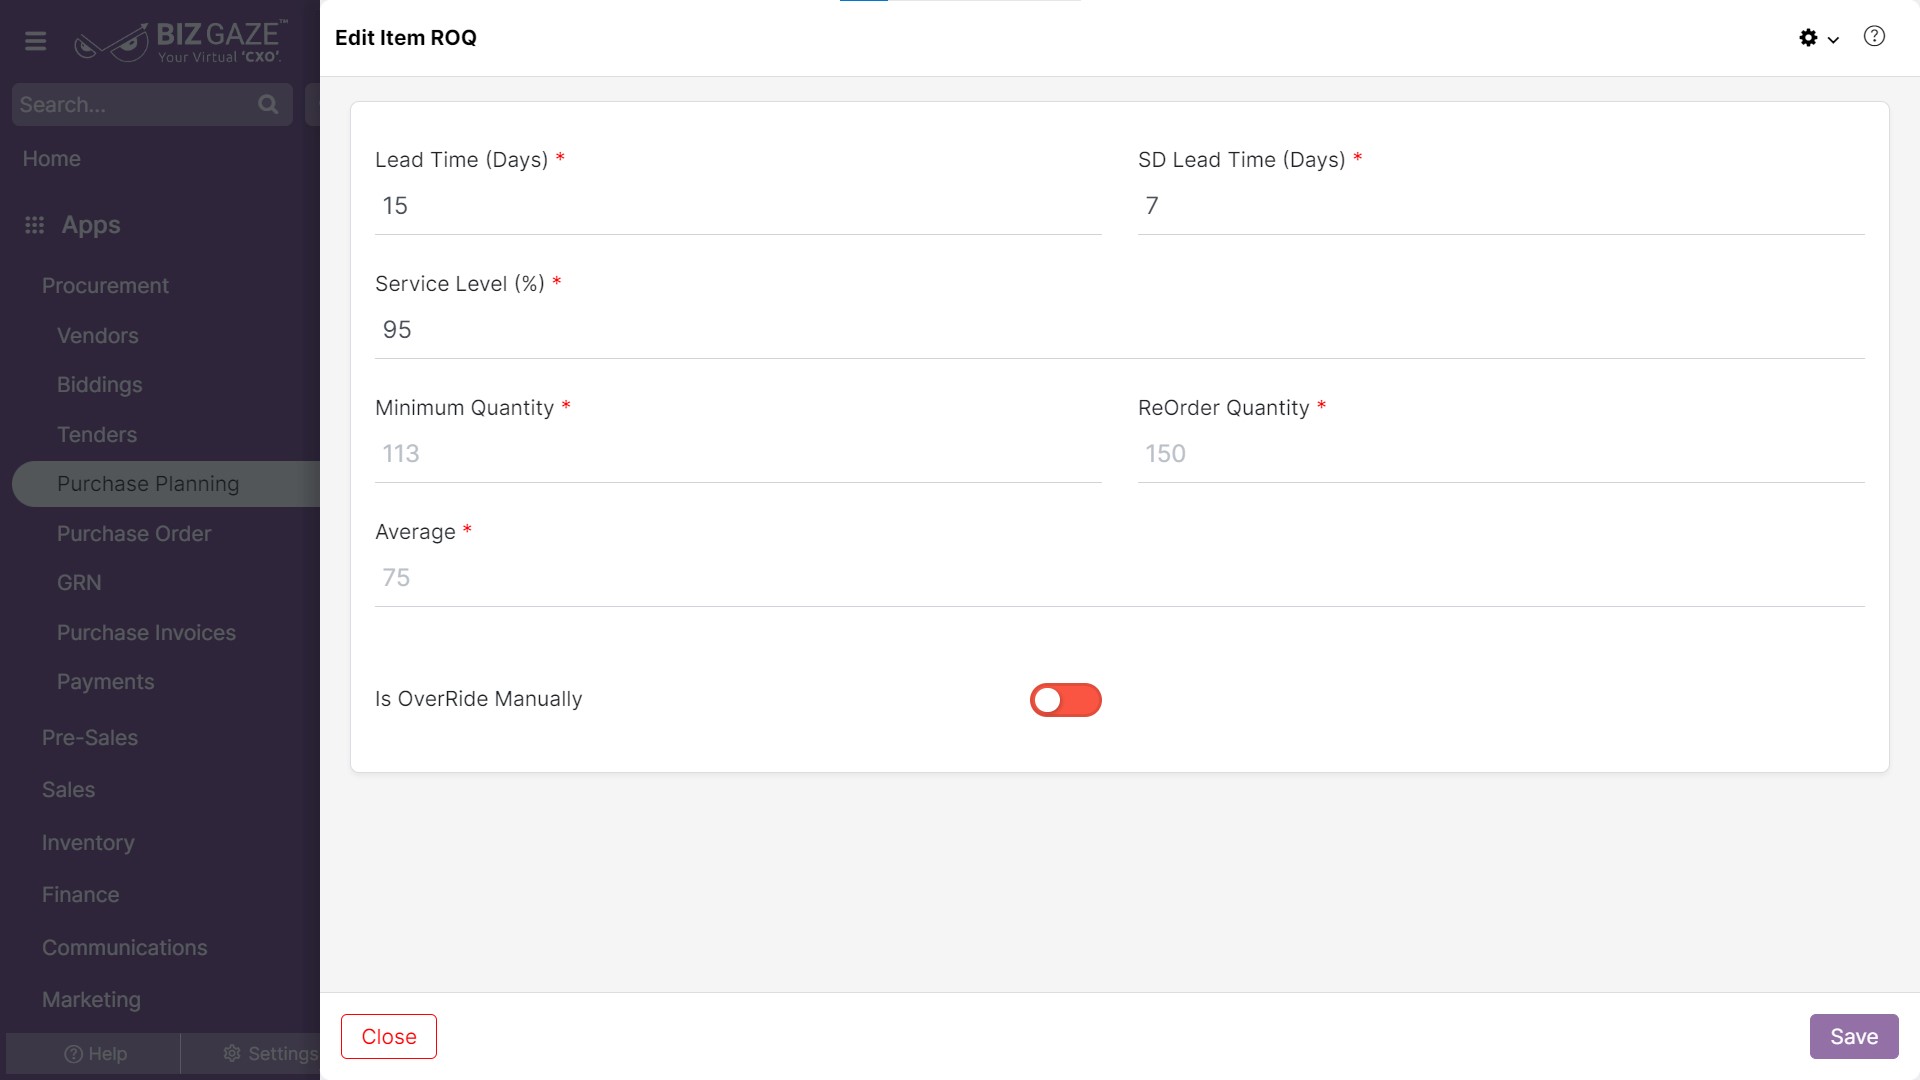
Edit Item ROQ
User can click on the Edit (Pencil icon) beside the Item name to Edit Item ROQ
| Field name | Description |
| Lead Time (Days) | By default the system displays Lead Type (In Days) of the Item ROQ; if user wants to change it, enter the lead Time in days. Lead Type refers to the duration or number of days it takes for an item or product to be replenished or received after an order has been placed. |
| SD Lead Time (Days) | By default the system displays SD Lead Time (In Days) of the Item ROQ; if user wants to change it, enter the SD lead Time in days. Supplier Delivery Lead Time or Supplier Lead Time, specifically refers to the lead time associated with the supplier or vendor delivering the goods or materials. |
| Service Level (%) | By default the system displays Service Level (In Percentage) of the Item ROQ; if user wants to change it, enter the Service level value (In %). It is a measure of the desired level of customer service or fulfillment performance. |
| Is Override Manually | The system automatically shows whether the toggle is enabled or not. If user wants to change it, click on the Toggle. The toggle turns to Green in color when enabled and red when disabled. |
| When the Toggle is enabled, user can over ride the item ROQ manually | |
| Minimum Quantity | By default the system displays Minimum quantity of the Items; if user wants to change it, enter the quantity value. Minimum Order Quantity (MOQ), refers to the minimum quantity of a product or item that a buyer must purchase or order in a single transaction. |
| Re-order Quantity | By default the system displays the Re-order quantity of the Items; if user wants to change it, enter the item quantity value. It refers to the quantity at which the inventory is deemed low or insufficient and triggers the reordering process to maintain an adequate stock level. |
| Average | By default the system displays the average quantity of the Items; if user wants to change it, enter the average item quantity value. |
Apply the required changes and click on Save.


