Debit Note can be generated from 3 Apps
1. Debit Note App
2. Purchase Invoice App
3. Offers App
Debit Note App
The creation process of Debit Notes from the Debit Notes app is as follows:
Navigation: Menu > Debit Note App > List View > Create(+)
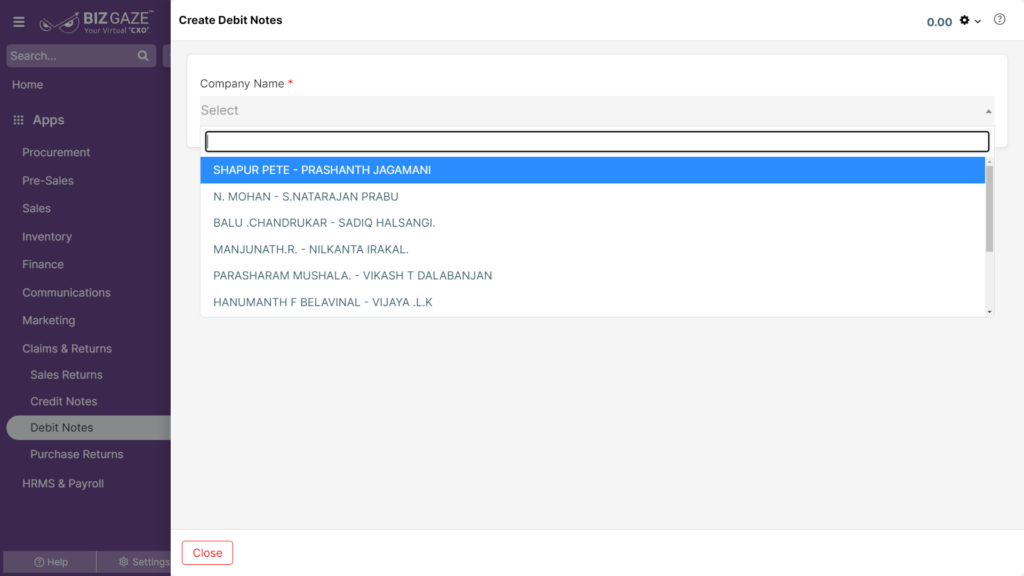
| Company Name | Select the company name from the drop-down list. | Yes |
Note: Star(*) marked fields are mandatory!
Note: System automatically picks up the basic details!
| Field Name | Field Description | Mandatory |
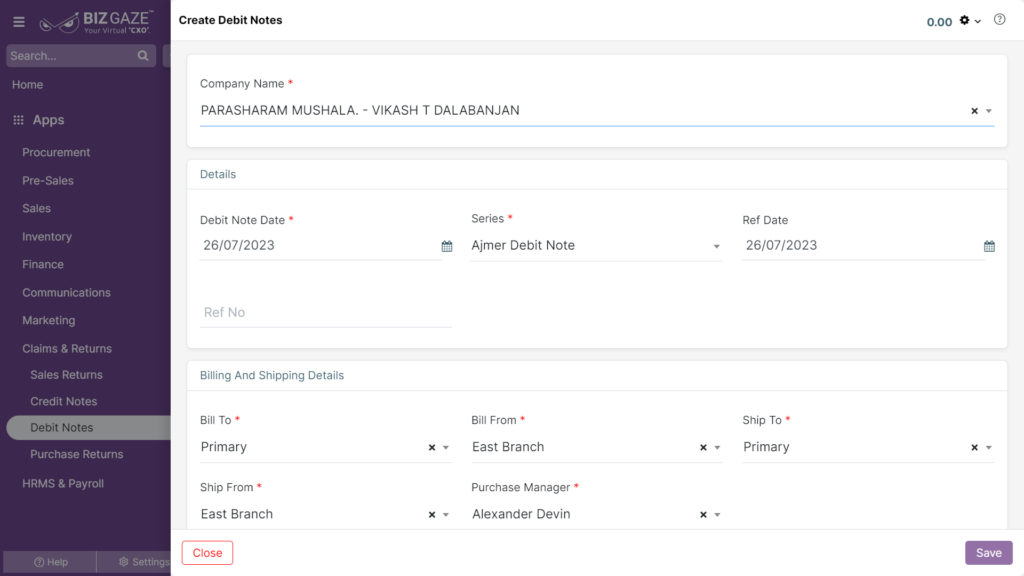
| Details | ||
| Invoice Date | Select Invoice Date from the calendar for the debit note. | Yes |
| Due Date | Select due date from the calendar. | Yes |
| Series | Select series from the drop-down list. | Yes |
| Ref Date | Select reference date from the calendar for the debit note. | No |
| Ref No | Enter reference number of your invoice for the debit note. | No |
| GST Number | Enter GST number | No |
| Exclude From Campaign | By changing the switch from red to green the invoice will be calculated in the campaign. | No |
| Billing and Shipping Details | ||
| Bill To | Select Bill To address from the down down list. | Yes |
| Bill From | Select Bill From address from the down down list. | Yes |
| Waybill No | User can enter the E-way bill no, its increase more than Rs. 50000/- | No |
| Ship To | Select Ship To address from the list drop-down list. | Yes |
| Ship From | Select Ship From address from the list drop-down list. | Yes |
| LoB | Select Line of Business segment from the drop-down list | Yes |
| Sales Person | Select Sales Person name from the drop-down list. | Yes |
| Payment Term | Select Payment Term days from the drop-down list. | Yes |
| More Options | By clicking on more options user can view the following details Payment Type: User can select the payments from the drop-down list in the order. Tax Type: User can select the tax type from the drop-down list to the order. |
|
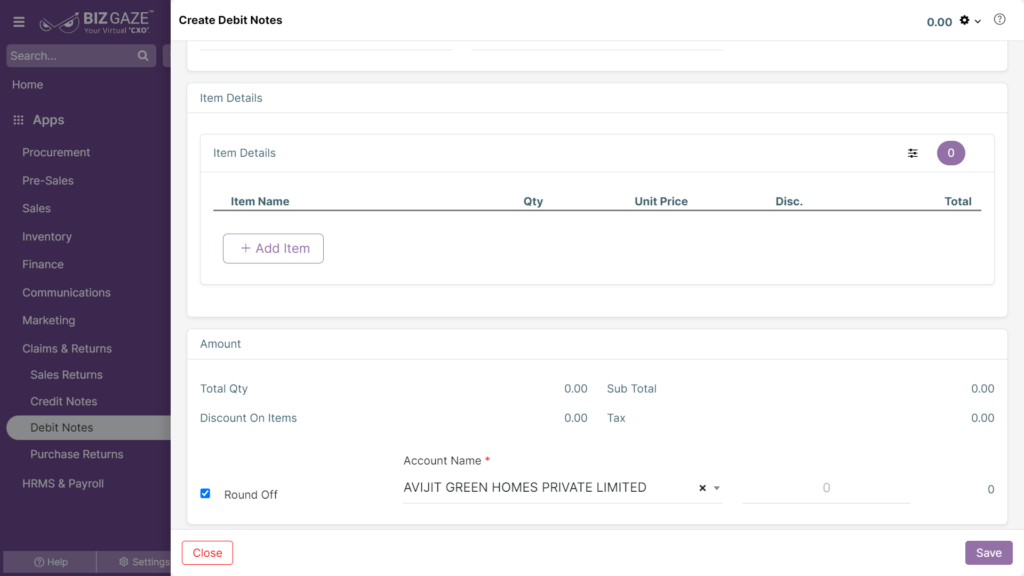
| Item Details | ||
| Add items: Click adds items to select the items | ||
| Select | Select name of the item from the list. | Yes |
| Qty(Quantity) | Enter number of items (quantity) to be returned | Yes |
| Unit Price | Price of the item is automatically generated by the system or user can manually enter the value | Yes |
| Disc.(Discount) | Select discount type from the drop-down and enter the value. | No |
| Add Discount Item: User can click Add discount item to select the items | ||
| Select | Select name of the item from the list. | No |
| Description | Enter description for the item. | No |
| Value | Enter value of the item. | No |
| Amount | ||
| Total Qty | Total quantity of the items in the debit note | |
| Sub Total | Value of the item on debit note | |
| Discount On Items | Discount value given in the debit note | |
| Tax | The value of taxes on total items | |
| Add Expense | By clicking on add expense, user can view the following fields Select Expense: Select the expense name from the drop down list. Description: Enter description for the expense. Value: Enter value of the expense. |
|
| Adjustment | When a user enables the “Adjustment” checkbox, the system automatically adjusts the value to the nearest decimal. If the users click on the checkbox, users can manually enter the values | |
| Account Name (Ledger Name) | Select account name from the list of the ledger account that the value has to be adjusted | Yes |
| Value | Enter the adjusted value | Yes |
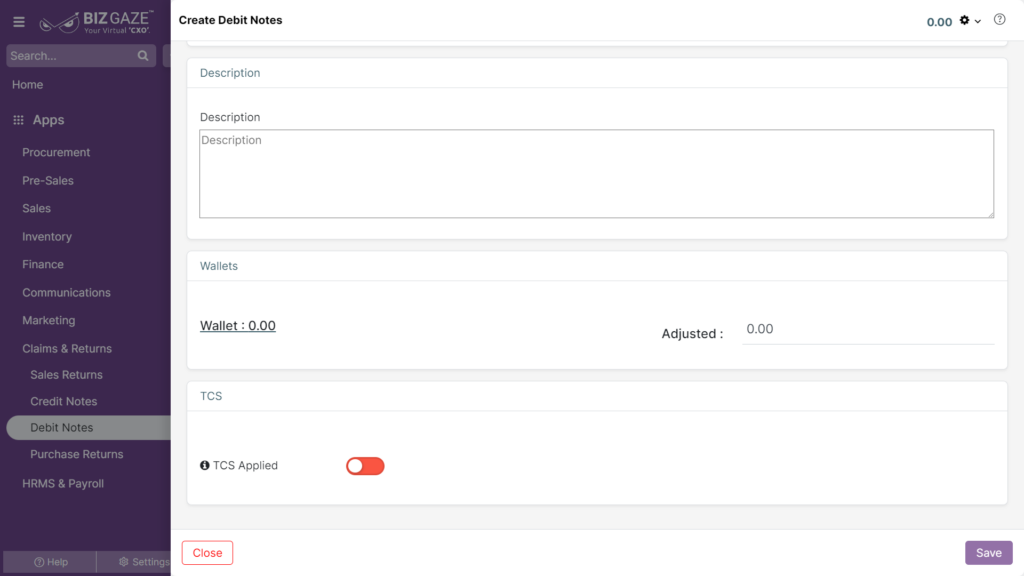
| Description | ||
| Description | Enter a short notes or comments for the debit note | No |
| TCS | |
| TCS Applied | User can click on the Toggle to apply the TCS (Tax Collected at source). The Toggle turns to green in color when enabled and red when disabled. |
| Wallets | |
| Adjustment | By tick mark the check box, the system automatically adjusts the amount to the decimal value or by Opting the check box user can enter manually. |
| Account Name | The user can select the account name from the dropdown list for the adjusted amount. |
Apply all the required details and click on save.
Purchase Invoice App
Navigation: Menu > Purchase Invoice App > List View > Select Record > More(Down Arrow) > Create Return
Note: System automatically pick up the invoice details!
The user needs to change the return quantity of the invoice and click on save.
Offers App
Navigation: Menu > Offers App > List View > Select the Campaign > Down Arrow > Finalize
Note: Star(*) marked fields are mandatory!
| Field Name | Field Description | Mandatory |
| Credit Note Item | Select Item Name for the credit note from the list. | Yes |
| Credit Note Series | Select credit note from the list, already created in the application | Yes |
| Credit Date | Select credit note generated date from the calendar | Yes |
| Order Series | Select order series from the list, already created in the application | Yes |
| Is Tax Inclusive: | User can tick the check box, the tax is included for the credit note. | No |
| Point Value | Enter value points for the campaign to generate a credit note | Yes |
Finally, click on “Save.”