The process to update Expense Item
Menu > Expenses App > Menu(Three Dots) > Expense Items > Select the Expense Item > Edit (Pencil Icon)
If user wants to update the existing Expense Item details, click on the Edit (Pencil Icon) option and fill in the required details.
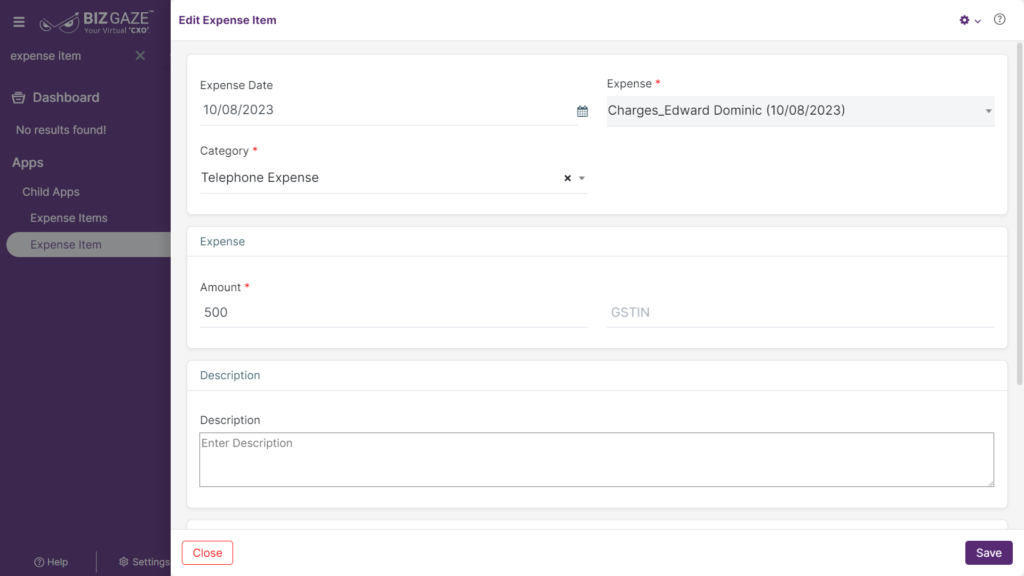
Edit Expense Item
| Field Name | Description |
| Expense Date | By default the system shows the name of the expense; if user wants to change it, select the date of expense from the calendar |
| Expense Name | By default the system shows the name of the expense; if user wants to change it, enter the new name of the expense |
| Category | By default the system shows the expense category name; if user wants to change it, select the expense category from the list |
| Expense | |
| Amount | By default the system shows the expense amount; if user wants to change it, enter the expense amount |
| GST No. | Enter the GST number of the organization |
| Description | User can comment or enter short notes about the Expense Item |
| If user selects expense category as ‘Travel’, user can add Mileage by clicking on the checkbox and fill the required details | |
| Mileage : User can click on the checkbox to enable the mileage of the vehicle | |
| Mileage type | Select Mileage type from the drop-down list |
| Vehicle Type | Select vehicle type from the drop-down list |
| Rates Per Mi | By default the system takes Rates based on the Vehicle type |
| Start Reading | Enter the start reading of the vehicle before travel |
| End Reading | Enter the end reading of the vehicle after travel |
| Distance | By default the system loads the distance based on the vehicle readings |
Apply all the details and click on Save.
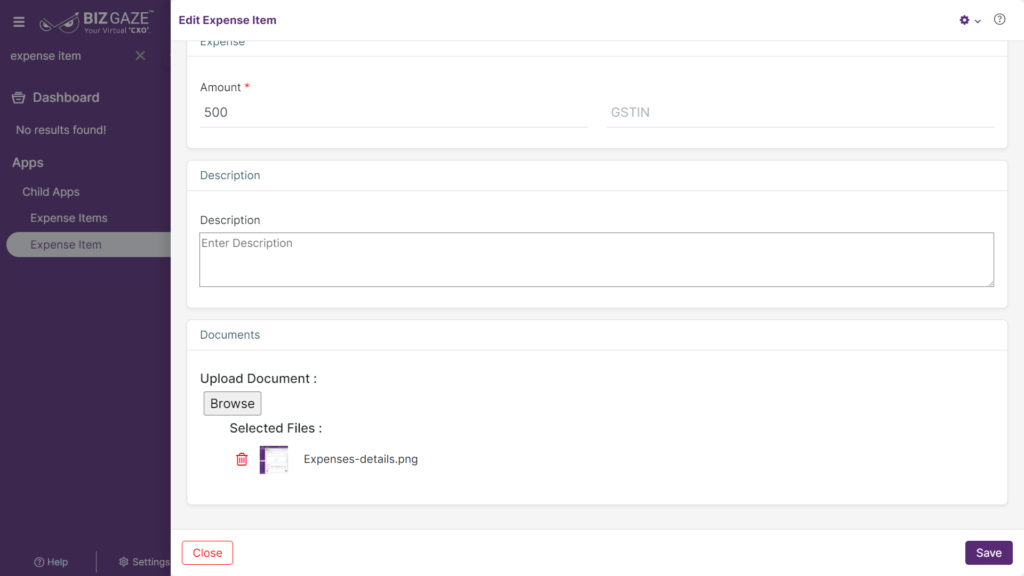
| Attachments | |
| Document Name | User can click on Browse and select an image/document of the Expense item to upload from the local storage |
| Document Type | Select the document type from the drop-down list |