The creation process of the Payments is as follows:
Navigation: Menu > Payment App > List View > Create (+)
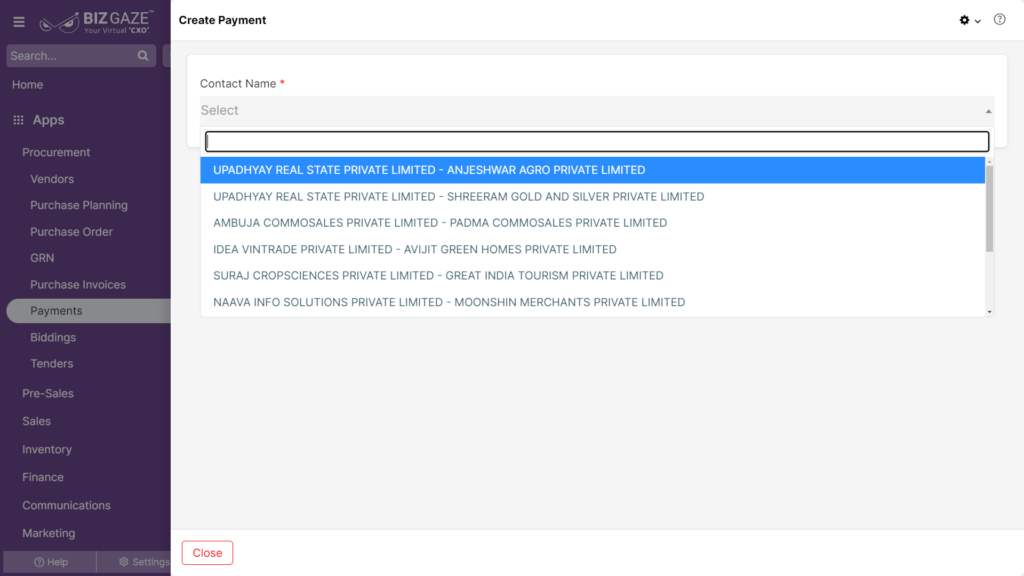
| Company Name | Select the company name from the drop-down list to create a receipt. | Yes |
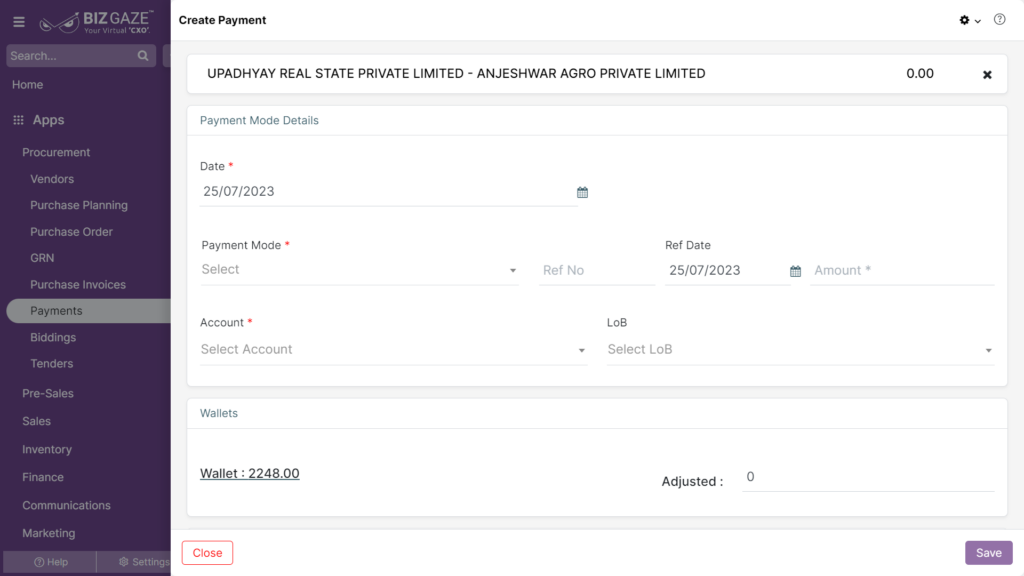
Note: Star(*) marked fields are mandatory!
| Field Name | Field Description | Mandatory |
| Payment Details | ||
| Date | Select the created date from the calendar for the receipt | Yes |
| Enable Cheque Mode | Toggle in Red color | |
| Payment Mode | ||
| Payment Mode | Users can select the payment mode from the drop-down list to pay the amount. | Yes |
| Ref No | Enter any reference number to the payment for quick identification. | No |
| Ref Date | Select the reference date from the calendar to the payment for quick identification. | No |
| Amount | Enter the amount to be paid. | Yes |
| Account | The system automatically picks up the account name from the list of configurations done for that model. Users can manually set the account for the payment mode. | Yes |
| LoB | The user can select the LoB name from the drop-down list for the payment. | Yes |
| Payment Details | ||
| Date | Select the created date from the calendar for the payment | |
| Enable Cheque Mode | Used changed the switch to Green color | |
| Payment Mode Details (Cheque) | ||
| Payment Mode | The system automatically picks up check mode by the user changing the switch to green color. | Yes |
| Ref No | Enter any reference number to the payment for quick identification. | No |
| Ref Date | Select the reference date from the calendar to the payment for quick identification. | No |
| Amount | Enter the amount to be paid. | Yes |
| Bank Name | Select the bank name from the drop-down list. | Yes |
| Bank Branch | Select the bank branch name from the drop-down list. | Yes |
| Cheque Date | Select the cheque date from the calendar. | Yes |
| Cheque Number | Enter the cheque number. | Yes |
| Account | The system automatically picks up the account name from the list of configurations done for that model. Users can manually set the account for the payment mode. | Yes |
| LoB | The user can select the LoB name from the drop-down list for the payment. | Yes |
| Wallets | ||
| Wallets | The total available amount in the wallets for the customer. By clicking on the amount, the user can view the amount record-wise. The user adjusts the wallet amount of the payment. | No |
| Adjust | Enter the amount, the system automatically adjusts the amount from the old to new records. | No |
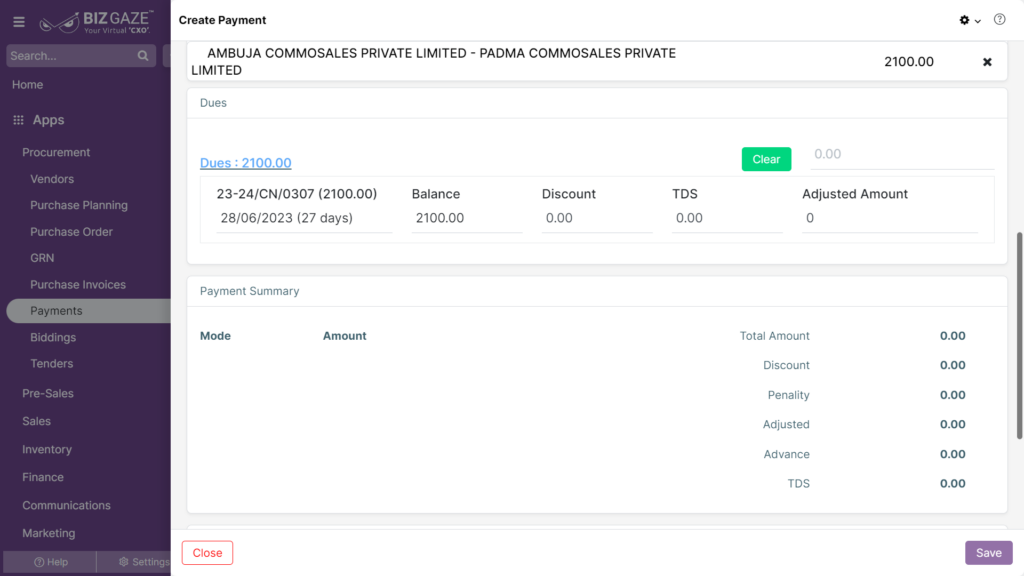
| Dues | ||
| Dues | The total due amount for the customer. By clicking on the amount, the user can view the pending amount record-wise. The user can select the amount to pay for the invoice. | No |
| Auto Adjust | By clicking on auto adjust, the system automatically adjusts the amount from old to new invoices. | No |
| Payment Summary | ||
| Mode | The payment mode for the payment. | |
| Amount | The total amount paid in the payment mode. | |
| Total Amount | The total amount paid towards the payment | |
| Discount | The discount amount given (The payment was done within payment term for invoice). | |
| Penalty | The penalty amount(If the payment term was exceeded for the invoice). | |
| Adjusted | The total adjusted amount of the records (Invoices). | |
| Advance | The extra amount after the payment was done. | |
| TDS | The TDS calculated amount for the payment. | |
| Description | ||
| Description | User can comment or enter short notes about the Payment | No |
Apply all the required details and click on save.