The process to Create the Item details is as follows:
Navigation: Menu > Items App > Item Listview > Create (+)
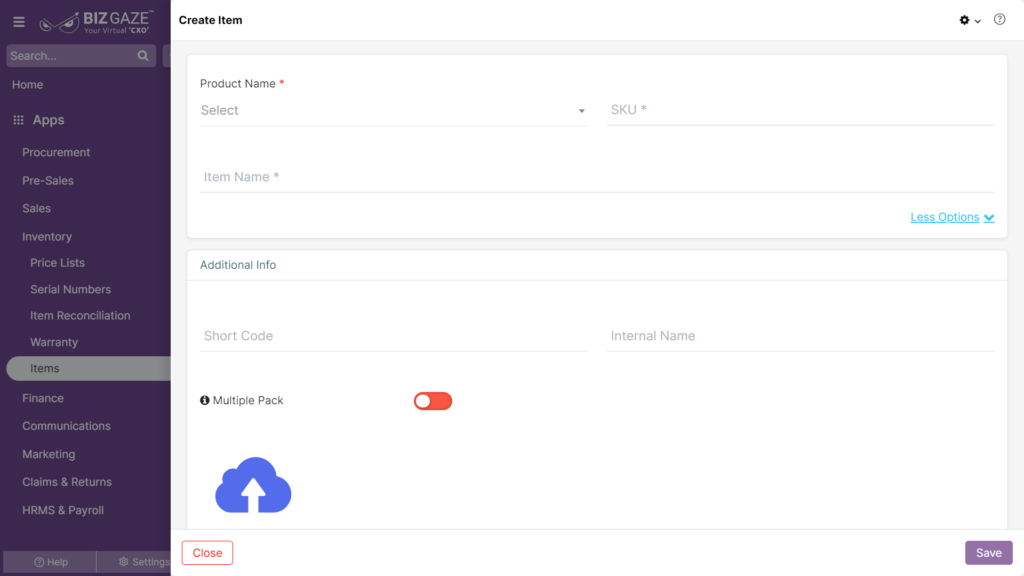
Note : All the star marked(*) fields are mandatory
Create Item
| Field Name | Field Description |
| Product Name | Select the product name from the list |
| Item Name | Enter the name of the item |
| SKU | Enter the SKU Code of the item |
| Upload | Select the background image to upload from the local storage |
| For Advanced Options, click on ‘More Options’ | |
| Additional Info | |
| Short Code | Enter the short name for the item |
| Weight | Enter the weight of the item |
| PDS Link | Enter the PDS link of the item for reference |
| SKU Available | Enter the SKU available of the item |
| Internal Name | Select the internal(alias) name of the item available in warehouse |
| Is Loyalty Applicable | User can click on the toggle to enable loyalty. The toggle turns to Green color when enabled and Red when disabled |
| Multiple Pack |
When a user enable “Multiple Pack” user should provide following details Piece Size: Enter the size of the item piece Piece Count: Enter the count of the item pieces |
| OB Qty | Select the OB(Opening balance) quantity from the calendar |
| OB Date | Select the OB(Opening balance) date from the calendar |
| Details URL | Enter the URL of the item for more details |
| Advantages | User can enter the advantages and benefits of the item |
| Sales Settings | |
| Sales Price | Enter the selling price of the product |
| Sales A/c | Select the sales account from the list |
| Credit note A/c | Select the credit note account from the list |
| Sales Return A/c | Select the sales return account from the list |
| Sales Description | User can enter the additional information about the sales settings |
| Purchase Settings | |
| Purchase Price | Enter the purchase price of the product |
| Purchase A/c | Select the Purchase account from the list |
| Debit A/c | Select the debit note account from the list |
| Purchase Return A/c | Select the purchase return account from the list |
| Purchase Description | User can enter the additional information about the purchase settings |
| Discontinue Settings | |
| Mark As D Portals | Select branch names from the list to mark as D Portals |
| Discontinue Portals | Select branch names from the list to assign discontinue portals |
| Tags | Select tags by clicking on the checkbox to assign |
Apply all the details and click on Save.