The update process of the Sales Contract is as follows:
Navigation: Menu > Sales Contract App > Listview > Select the Contract > Edit (Pencil Icon)
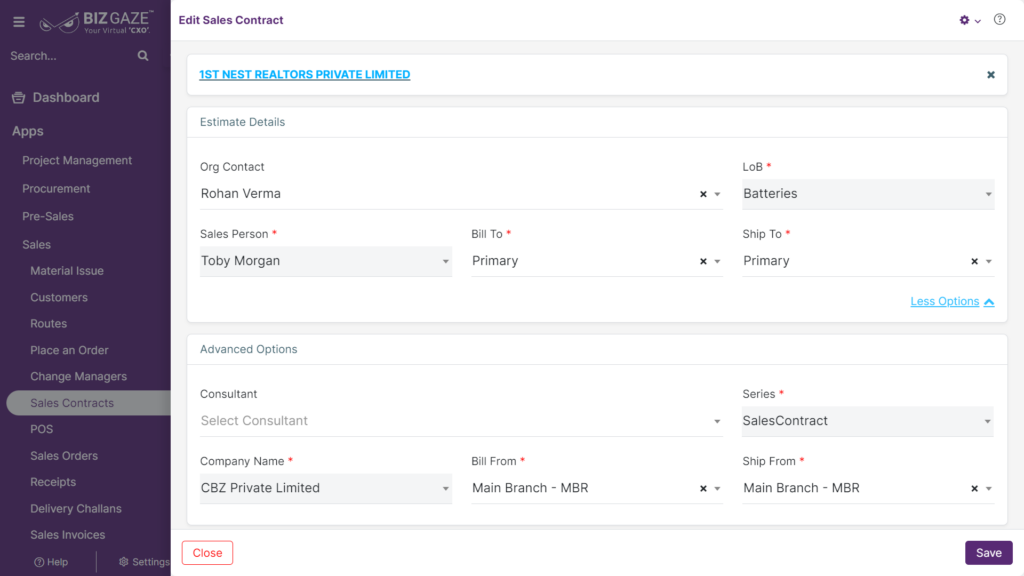
If user wants to update the already existing Sales Contract details, user needs to click on ‘Edit’ option at the top right corner and fill in the required details.
Edit Sales Contract
| Field Name | Description |
| Company name | System automatically loads company name by default, if user wants to change company name select a new company name from the list |
| Estimate Details | |
| Org Contact | The system automatically shows the Contact person name of the Organization; if user wants to change the Contact Person, select a new contact from the list |
| LoB | By default system shows LoB segment of the customer and if user wants to change the existing LoB segment, select a LoB segment from the list |
| Sales Person | By default system shows the Sales Person name for the customer and if user wants to change the Sales Person, select a new name from the list |
| Ship To | By default system shows the existing Ship To address and if user wants to change the address, select a new Ship To address of the buyer |
| Bill To | By default system shows the existing Bill To address and if user wants to change the existing address, select a new Bill To address of the buyer |
| Advanced Options | |
| Company name | By default the system loads the Company name |
| Bill From | By default system shows Bill From address of the company and if user wants to change the address, select a new address name from the list |
| Ship from | By default system shows Ship From address of the company and if user wants to change the address, select a new address name from the list |
| Consultant | By default system shows the Consultant name assigned and if user wants to change the Consultant name, select from the list |
| Series | By default the system loads series as Sales Contract |
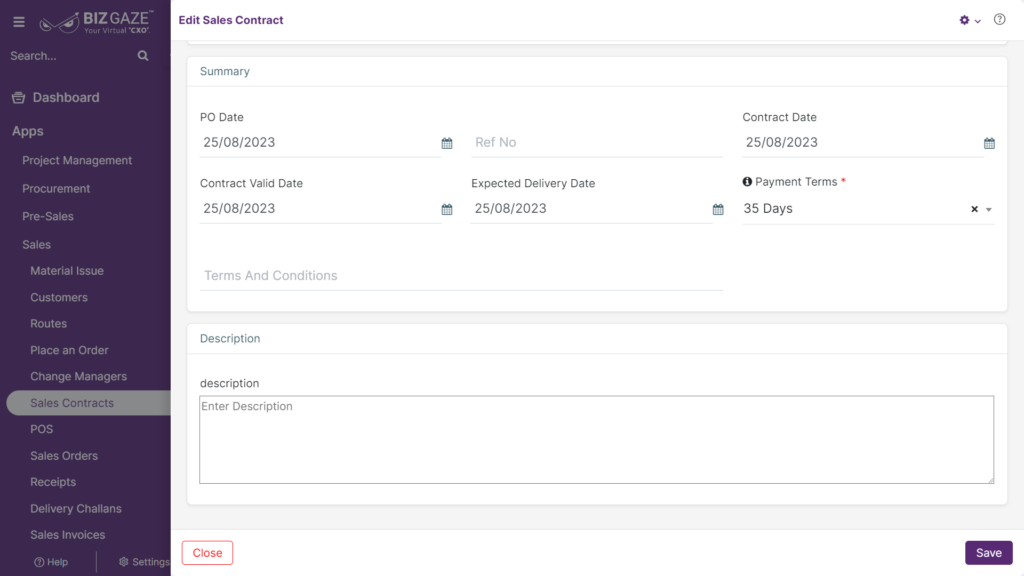
| Summary | |
| PO date | System automatically loads PO (Purchase Order) date of the Contract and if user wants to change it, set a new date from the calendar to apply |
| Ref no. | The system automatically shows the reference number of Sales Contract, if user wants to change it, enter a reference number for the Contract |
| Contract Date | System automatically shows the Sales Contract date, if user wants to change it, set a Sales Contract date from the calendar |
| Valid Date | System automatically shows the Sales Contract valid date, if user wants to change it, set valid date of the Sales Contract from the calendar |
| Expected Delivery | System automatically shows the Sales Contract Delivery date, if user wants to change it, set a Delivery date from the calendar |
| Payment term | By default system shows Payment Term allotted for the Sales Contract and if user wants to change it, select a new Payment Term from the list |
| Description | User can comment or enter short notes about the Sales Contract |
Apply the required details and click on Save.
Updates in Details Portlet
The process to update Contract Items is as follows:
Navigation: Menu > Sales Contract App > Listview > Select the Sales Contract > Details Portlet > Contract Items Widget > Edit (Three dots)
User can click on “+” button in Items Widget to add new items & it shows the labels of Item details. User can select and apply the required quantity of items of the Contract.
By default system displays Items details of the Contract and if user wants to update already existing Items of the Contract, click on Edit (Three dots) option to the right corner of Items Widget and apply the changes required
Edit Contract Items
| Field name | Description |
| Item details / Unit Price | System automatically loads item details of the order and if user wants to change Unit price of the item, click on Price displayed below Item name and update the unit price and discount value of the item |
| Discount type | User can also change discount type as percentage or value per unit |
| Quantity | System automatically shows Quantity of the order items and if user wants to change it, enter a new quantity in number or click on ‘+’ or ‘-’ to increase or decrease quantity respectively to the current quantity |
| Description | User can comment or enter short notes about the Contract Items |
Apply all the details and click on Save.
Manage Price (Rupee Symbol)
The process to Manage Price of Contract Items is as follows:
Navigation: Menu > Sales Contract App > Listview > Select the Sales Contract > Details Portlet > Contract Items Widget > Manage Price (Rupee Symbol)
By default the system displays Items details of the Contract and if user wants to update or edit the Discounts for Contract Items, click on Manage Price (Rupee Symbol) option beside the Create(+) option and apply the changes required.
| Field name | Description |
| Item name- SKU | Displays SKU code of the item. A SKU, which stands for Stock Keeping Unit, is a unique identifier for each of the products that makes it easier to track inventory |
| Qty | Enter quantity of the Contract Items |
| Discount | Enter discount value to be added for the Contract items |
| Select whether the discount offered is in percent or any fixed value and enter the value | |
| Contract Price | Enter the Contract price for the item |
Apply all the details and click on Save.
Documents
The process to add new documents is as follows:
Navigation: Menu > Sales Contract App > Listview > Select the Sales Contract > Details Portlet > Documents Widget > Edit (Pencil Icon)
System displays already existing document details of the customer and if user wants to add new documents, click on Create (+) option at the top right corner of the Documents widget.
User can click on Create (Pencil Icon) to upload files from local storage.
User can add customer documents like PAN, Address proofs, Aadhar card, organization related files and images. Upload the image and then click on Save.