The process to Edit the Ticket Group
Navigation: Menu > Tickets Groups App > Tickets Groups Listview > Select the Ticket Group > Edit (Pencil Icon)
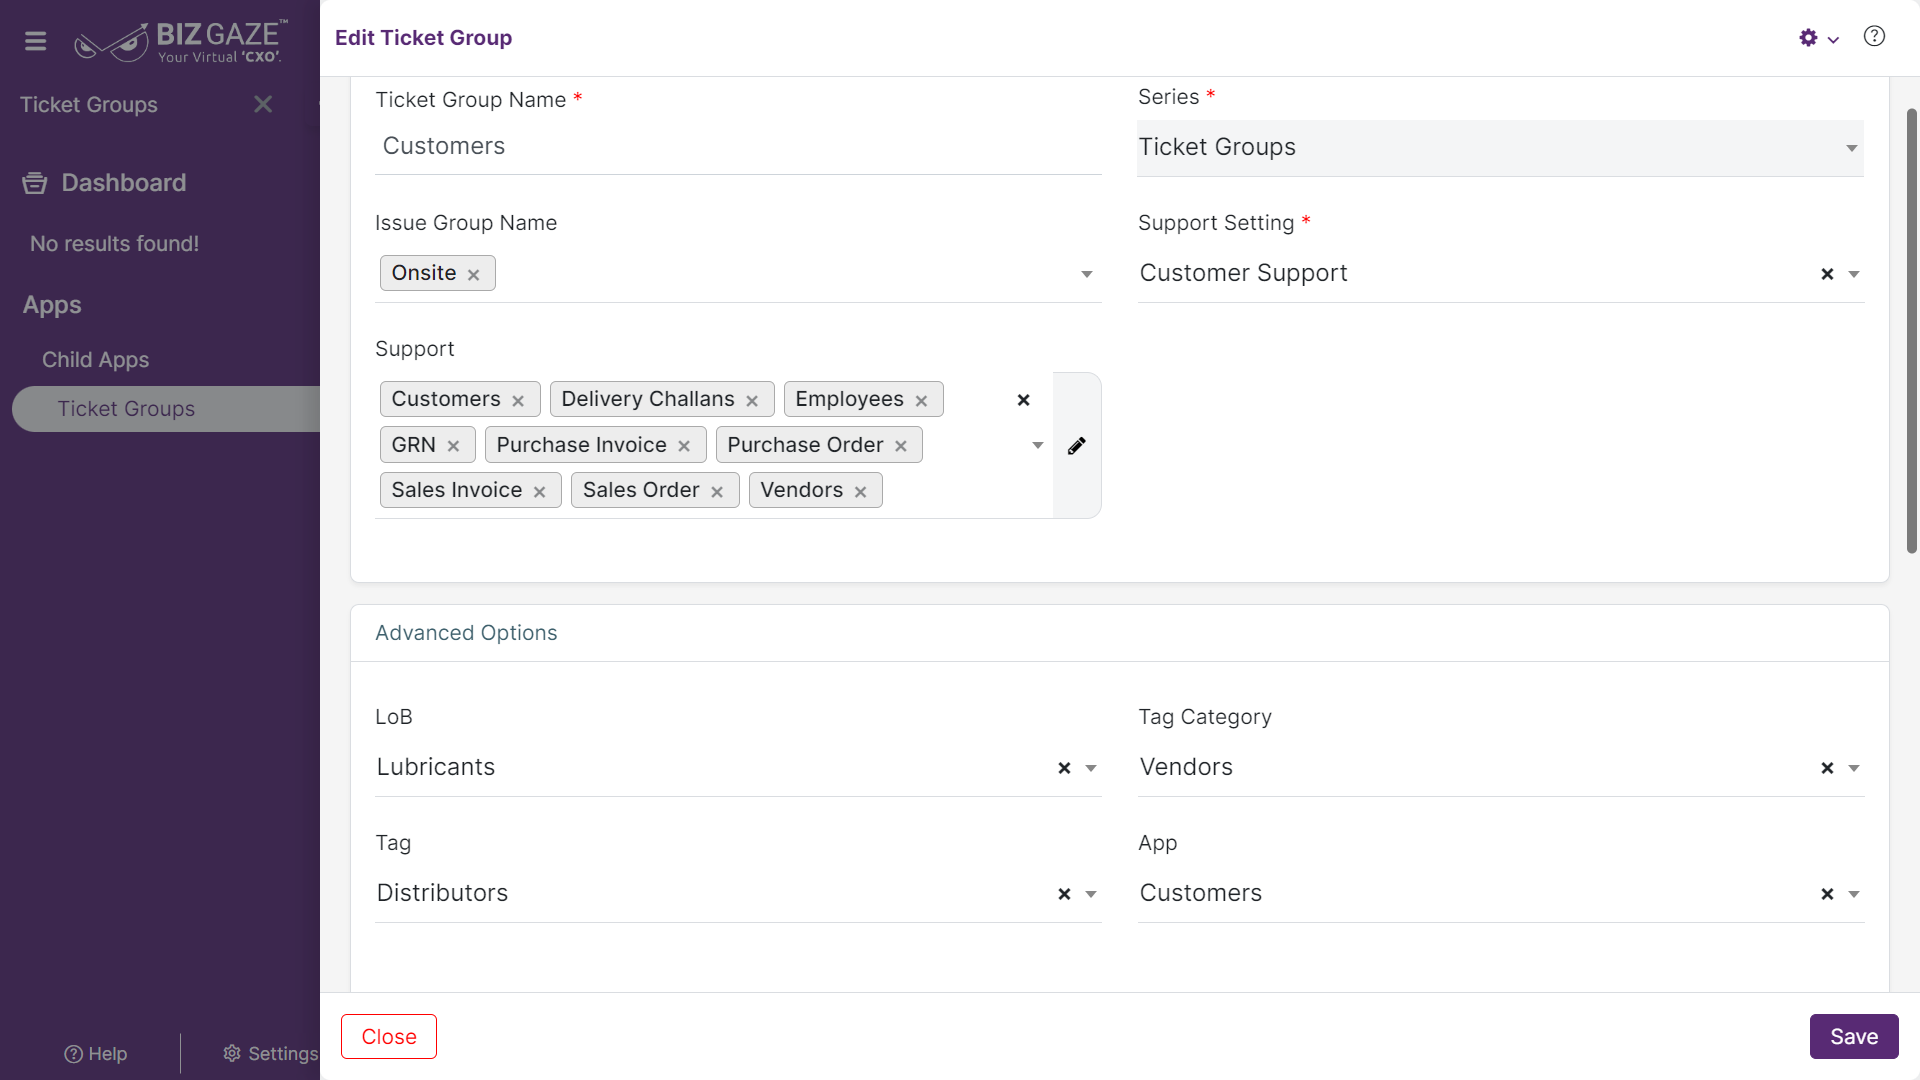
If user wants to update the existing Ticket Group Details, click on the ‘Edit’ (Pencil Icon) option and fill in the required details.
Edit Ticket Group
| Field name | Description |
| Group Name | By default the system displays the name of the Ticket Group; if user wants to change it, enter a new name for the Ticket group |
| Series | The system automatically takes series as Ticket Groups |
| Issue Group Name | By default the system displays the name of the Issue Group assigned; if user wants to change it, select a new Issue group name from the list |
| Support Setting | The system by default shows the existing support setting assigned; if user wants to change it, select a new support setting from the list |
| Advanced Options | |
| LoB | The system automatically takes LoB (Line of Business segment) |
| Tag Category | The system by default shows the existing Tag Category assigned; if user wants to change it, select a new Tag Category from the drop-down |
| Tag | The system by default shows the existing Tag assigned to the Ticket group; if user wants to change it, select the new Tag(s) from the drop-down list |
| App | The system by default shows the existing app name assigned; if user wants to change it, select a new app from the drop-down |
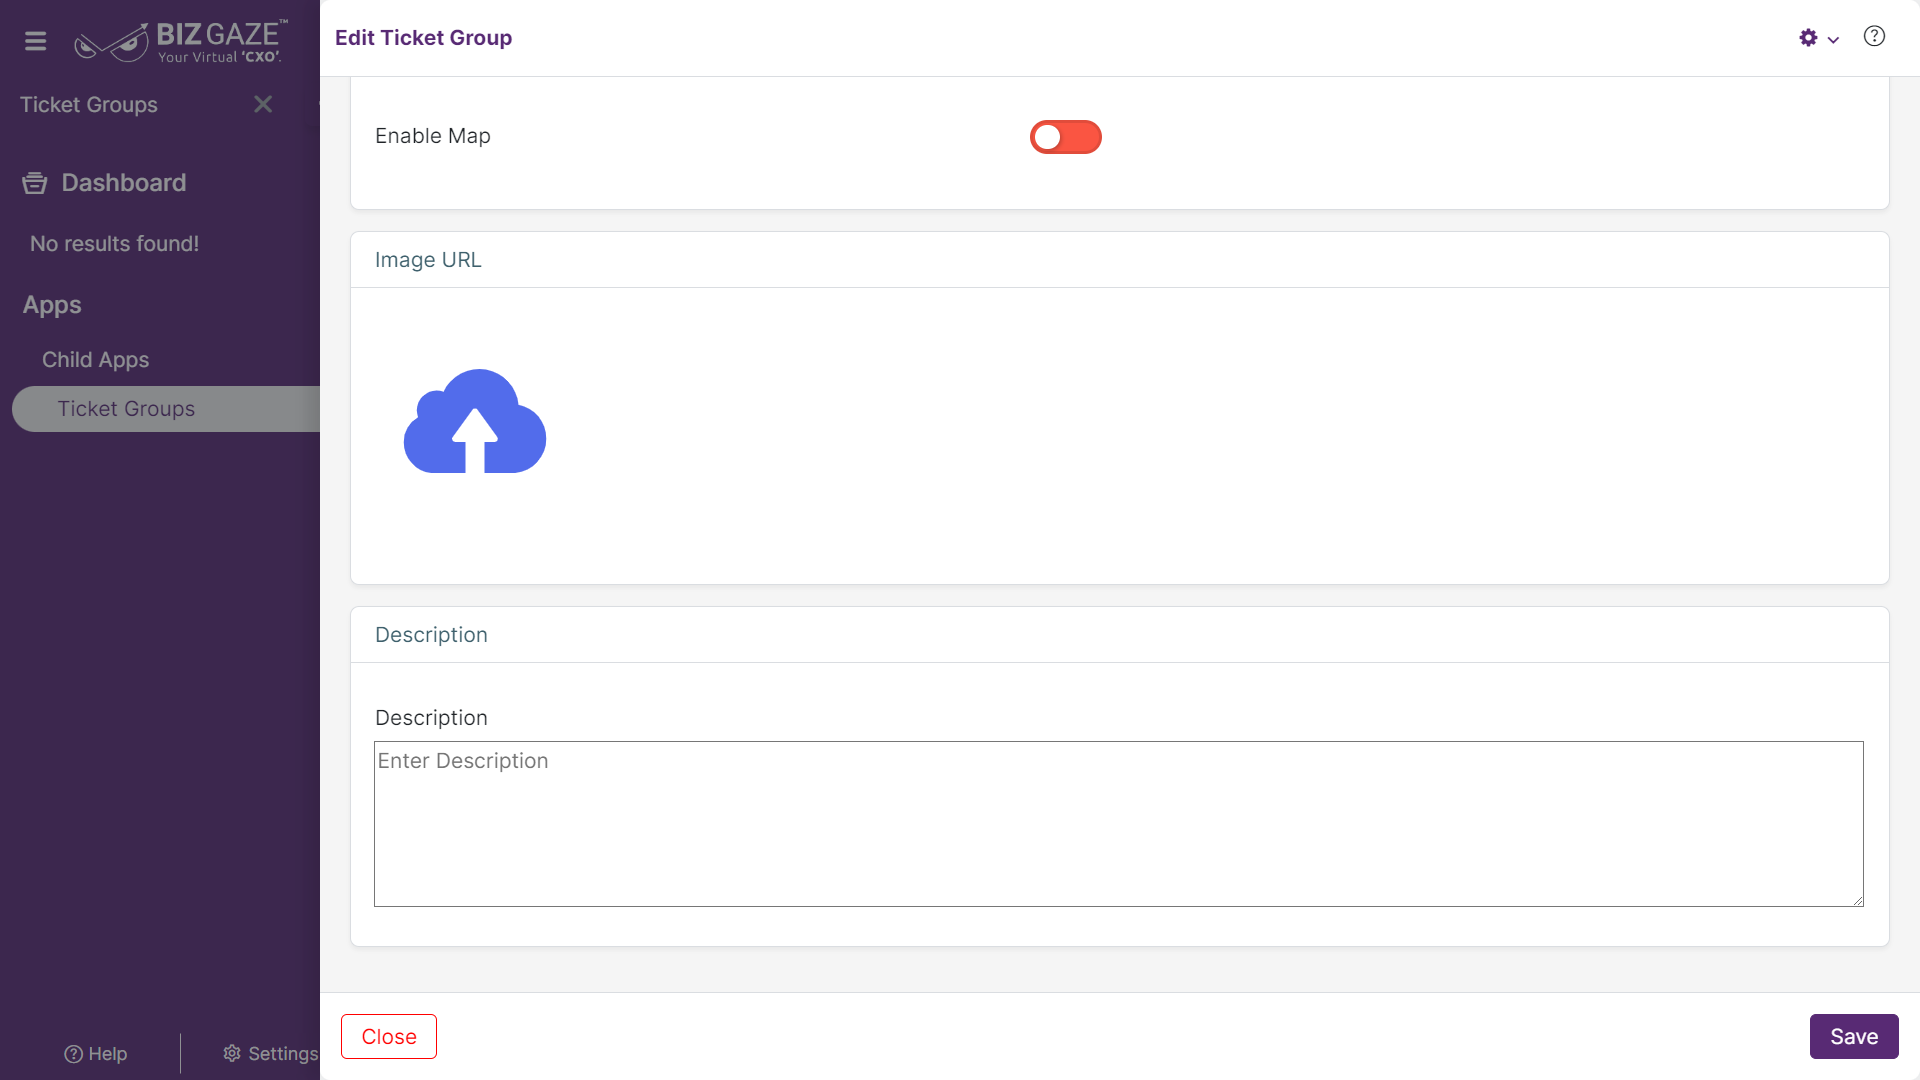
| Enable Map | The system displays whether the Map setting is enabled or not. If user wants to change it, user can select by clicking on the Toggle to enable/disable. The Toggle turns to Green in color when enabled and Red when disabled |
| Field name | Description |
| Image | User can upload image/file related to Ticket group. Click on choose image and select image from local storage |
| Description | User can comment or enter short notes about the Ticket group |
Apply the required changes and click on Save

