Credit Note can be generated from 3 Apps
1. Credit Note App
2. Sales Invoice App
3. Offers App
Credit Note App
The process to create the Credit Notes from Credit Notes app is as follows:
Navigation: Menu > Credit Notes App > Listview > Create (+)
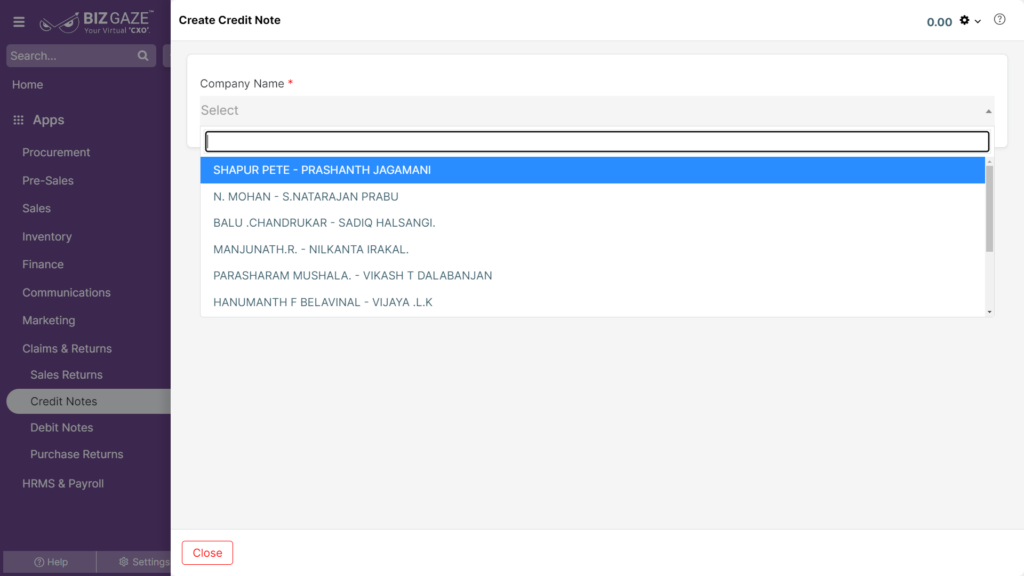
| Company Name | Select company name from the drop-down list. | Yes |
Note: Star(*) marked fields are mandatory!
Note: System automatically picks up the basic details!
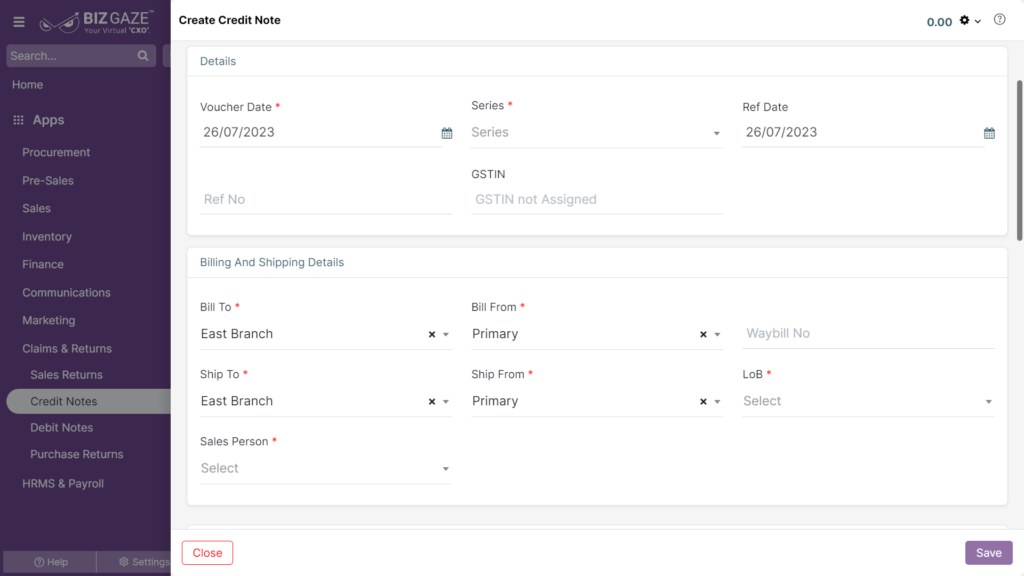
| Field Name | Field Description | Mandatory |
| Details | ||
| Invoice Date | Select Invoice Date from calendar for the credit note | Yes |
| Due Date | Select Due Date from the calendar. | Yes |
| Series | Select series from the drop-down list. | Yes |
| Ref Date | Select reference date from the calendar for credit note. | No |
| Ref No | Enter reference number of your invoice for the credit note. | No |
| GST Number | Enter GST number | No |
| Exclude From Campaign | By changing the switch from red to green the invoice will be calculated in the campaign. | No |
| Billing and Shipping Details | ||
| Bill To | Select Bill To address from the down down list. | Yes |
| Bill From | Select Bill From address from the down down list. | Yes |
| Waybill No | User can enter the E-waybill no, its increase more than Rs. 50000/- | No |
| Ship To | Select Ship To address from the list drop-down list. | Yes |
| Ship From | Select Ship From address from the list drop-down list. | Yes |
| LoB | Select LoB from the drop-down | Yes |
| Sales Person | Select Sales Person name from the drop-down list. | Yes |
| Payment Term | Select Payment Term days from the drop-down list. | Yes |
| More Options | By clicking on more option user can view the following details Payment Type: The user can select the payments from the drop-down list in the order. Tax Type: The user can select the tax type from the drop-down list to the order. |
|
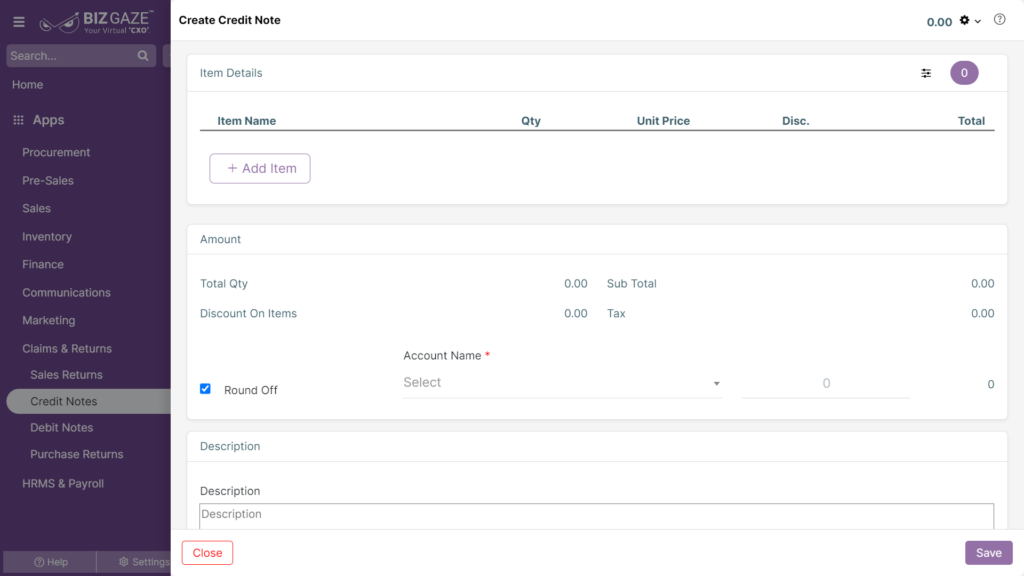
| Item Details | ||
| Add items: Click adds items to select the items | ||
| Select | Select name of the item from the list. | Yes |
| Qty(Quantity) | Enter number of items (quantity) to be returned | Yes |
| Unit Price | Price of item is automatically generated by the system or user can manually enter the value | Yes |
| Disc.(Discount) | Select discount type from the drop-down and enter the value. | No |
| Add Discount Item: Click adds a discount item to select the items | ||
| Select | Select name of the item from the list. | No |
| Description | Enter description for the item. | No |
| Value | Enter value of the item. | No |
| Amount | ||
| Total Qty | Total quantity of the items on the credit note | |
| Sub Total | The value of the item on credit note | |
| Discount On Items | Discount value given on the credit note | |
| Tax | The value of taxes applied on total items | |
| Add Expense | By clicking on add expense, user can view the following fields Select Expense: Select the expense name from the drop down list. Description: Enter the description for the expense. Value: Enter the value of the expense. |
|
| Adjustment | When a user enables the “Adjustment” checkbox, the system automatically adjusts the value to the nearest decimal. If the users uncheck the checkbox, users can manually enter the values | |
| Account Name (Ledger Name) | Select account name from the list of the ledger account that the value has to be adjusted | Yes |
| Value | Enter the adjusted amount value | Yes |
| Description | Enter a short notes for the credit note | No |
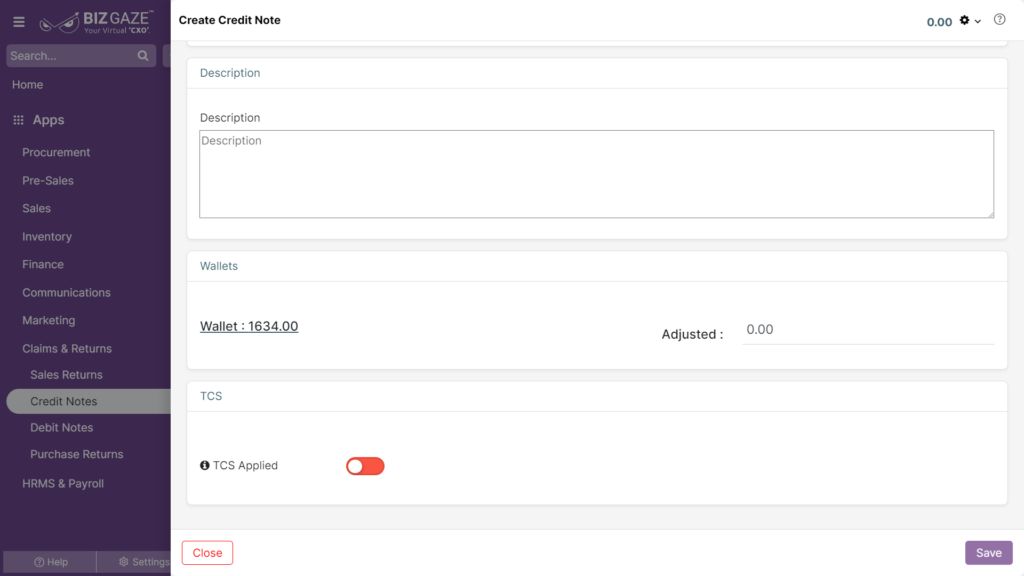
| TCS | |
| TCS Applied | User can click on the Toggle to apply the TCS (Tax Collected at source). The Toggle turns to green in color when enabled and red when disabled. |
| Wallets | |
| Adjustment | By tick mark the check box, the system automatically adjusts the amount to the decimal value or by Opting the check box user can enter manually. |
| Account Name | The user can select the account name from the dropdown list for the adjusted amount. |
Apply all the required details and click on save.
The creation process of Credit Notes from Sales Invoice App is as follows:
Sales Invoice App
Navigation: Menu > Sales Invoice App > List View > Select Invoice > Down Arrow > Create Return
Note: System automatically pick up the invoice details!
The user needs to change the return quantity of the invoice and click on save.
The creation process of Credit Notes from Offers App is as follows:
Offers App
Navigation: Menu > Offers App > List View > Select the Campaign > Down Arrow > Finalize
Note: Star(*) marked fields are mandatory!
| Field Name | Field Description | Mandatory |
| Credit Note Item | Select the Item Name for the credit note from the list. | Yes |
| Credit Note Series | Select the credit note from the list, already created in the application | Yes |
| Credit Date | Select the credit note generated to date from the calendar | Yes |
| Order Series | Select the order series from the list, already created in the application | Yes |
| Is Tax Inclusive: | The user can tick the check box, the tax is included for the credit note. | No |
| Point Value | Enter the value points for the campaign to generate a credit note | Yes |
Apply all the required details and click on save.