The update process of Lead is as follows:
Navigation: Menu > Leads App > Listview > Select the Lead > Edit (Pencil Icon)
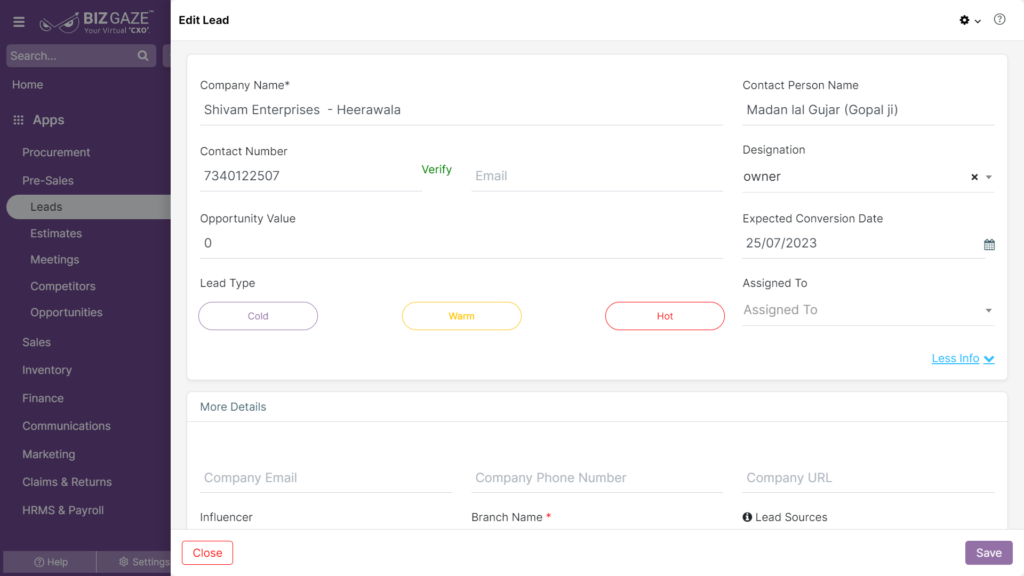
If user wants to update the already existing Lead details, user needs to click on ‘Edit’ option at the top right corner and fill in the required details.
Edit Lead
| Field name | Description |
| Company Name | System automatically loads company name by default, if user wants to change the name, enter a name for the company |
| Contact Person | The system automatically shows the Point of Contact Person name of the Organization; if user wants to change it, enter a name in the field |
| Contact Number | By default system shows the existing Phone number of the employee, if user wants to change the number, enter the Mobile number. |
| Verify: User can click on verify and enter the OTP sent to the registered mobile number | |
| By default system shows the existing Mail Id of the Lead, if user wants to change it, enter the new Mail Id of the Lead | |
| Designation | By default system shows the existing designation as what he does in the company, if user wants to change it, select a new designation from the list |
| Opportunity Value | Opportunity Value of the Lead is displayed. If user wants to change it, enter a new value in the field |
| Expected Conversion Date | Displays the Expected date of the Lead conversion to a potential customer. If user wants to change it, set a new date from the calendar |
| Lead Type | The system automatically shows the Lead Type by default; if user wants to change it, select from the list below (Cold, Warm, or Hot) |
| Source Details | |
| Sources | The system automatically shows the source of the Lead; if user wants to change it, select the source from the drop-down list |
| Industry | The system automatically shows the Industry type of the Lead by default; if user wants to change it, select an industry from the drop-down list |
| Assigned To | The system automatically shows the to whom the Lead is assigned; if user wants to change it, select a name from the drop-down list to assign |
| More Options : For Advanced options about the Lead, user can click on More options | |
| Company Phone Number |
By default system shows the existing Phone number of the Lead’s company, if user wants to change the number, enter the new Mobile number. Verify: User can click on verify and enter the OTP sent to the registered mobile number |
| Company Email | By default system shows the existing Mail Id of the Lead’s company, if user wants to change the Email, enter the new Mail Id in the field |
| URL | By default system shows the existing URL of the Lead’s company, if user wants to change the URL, enter the new URL in the field |
| Influencer | By default system shows the existing Influencer assigned to the Lead; if user wants to change it, select a new Influencer name from the list |
| Branch Name | The system automatically loads branch name of the company by default, if user wants to change it, select a new branch name from the list |
| Series | By default the system takes the series as Leads |
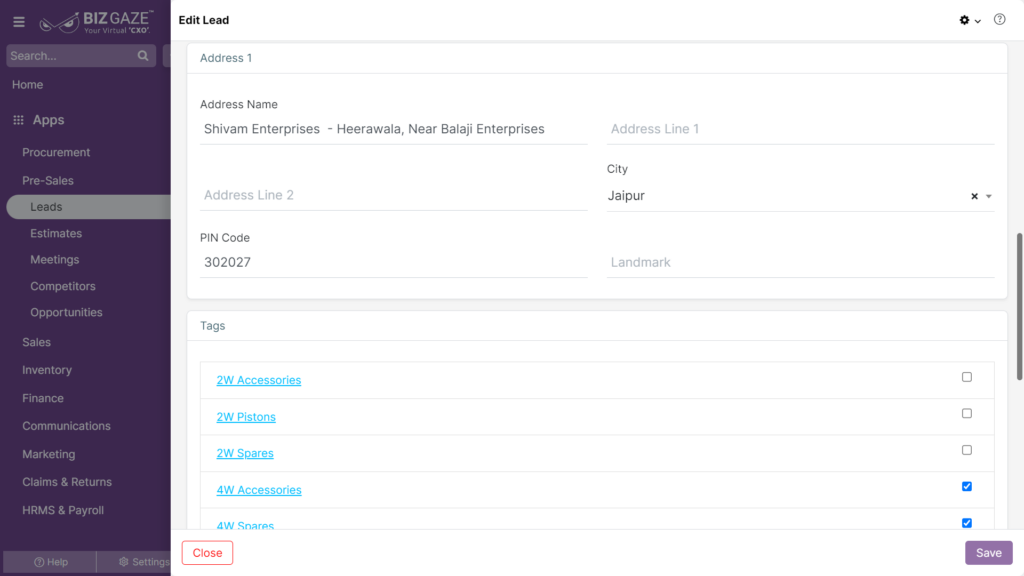
| Address | |
| Address name | By default the system shows the existing address name; if user wants to change it, enter the address name in the field |
| Pin Code | By default the system shows the existing Pin Code of the address; if user wants to change it, enter the address Pin Code in the field |
| Address line 1 & 2 | By default the system shows the existing Address line 1 and line 2 details; if user wants to change it, enter the line 1 & 2 address details in the field |
| City | By default the system shows the existing City name; if user wants to change it, enter the City name in the field |
| Landmark | By default the system shows the existing Landmark details; if user wants to change it, enter the new landmark details in the field |
| Description | User can comment or enter short notes about the Lead |
| Tags | By default system shows Tag assigned to the Lead and if user wants to change the LoB Tag, click on the checkbox against the Tag |
Apply the required details and click on Save.
Updates in Details Portlet
The process to update Contact Details is as follows:
Navigation: Menu > Leads App > Listview > Select the Lead > Details Portlet > Contact Details Widget >Edit (Pencil Icon)
The system displays Point of contact name details and if user wants to change the existing contact person(Assigned To), user needs to click on ‘Edit’ option (Pencil icon) at the top right corner of the Contact details widget and select the contact name from the drop-down list.
Apply the required changes and click on Save.
The process to update the Lead’s Address is as follows:
Navigation: Menu > Leads App > Listview > Select the Lead > Details Portlet > Address Widget > Edit (Pencil Icon)
By default the system shows the existing address of the Lead, click on the Edit(Pencil Icon). User can add Multiple addresses if the Lead locations are different.
Edit Lead Address
| Field name | Description |
| Address Name | By default the system shows the existing address name; if user wants to change it, enter the address name in the field |
| Pin Code | By default the system shows the existing Pin Code of the address; if user wants to change it, enter the address Pin Code in the field |
| Address Line 1&2 | By default the system shows the existing Address line 1 and line 2 details; if user wants to change it, enter the line 1 & 2 address details in the field |
| City | By default the system shows the existing City name; if user wants to change it, enter the City name in the field |
| Landmark | By default the system shows the existing Landmark details; if user wants to change it, enter the new landmark details in the field |
Apply the required changes and click on Save.
The process to update the Lead’s Opportunity details:
Navigation: Menu > Leads App > Listview > Select the Lead > Details Portlet > Opportunity Widget > Edit (Pencil Icon
The system displays Opportunity details of the Lead and if user wants to change the existing details, user needs to click on ‘Edit’ option (Pencil icon) to the right corner of the Opportunity widget and fill in the required details.
Edit Lead Opportunity
| Field name | Description |
| Opp. Value | By default the system shows the existing Lead’s Opportunity Value; if user wants to change it, enter the value in the field |
| Exp. Closure | By default the system shows the existing Lead Conversion date; if user wants to change it, set an Expected conversion date of the Lead to a potential customer from the calendar |
Apply the required changes and click on Save.