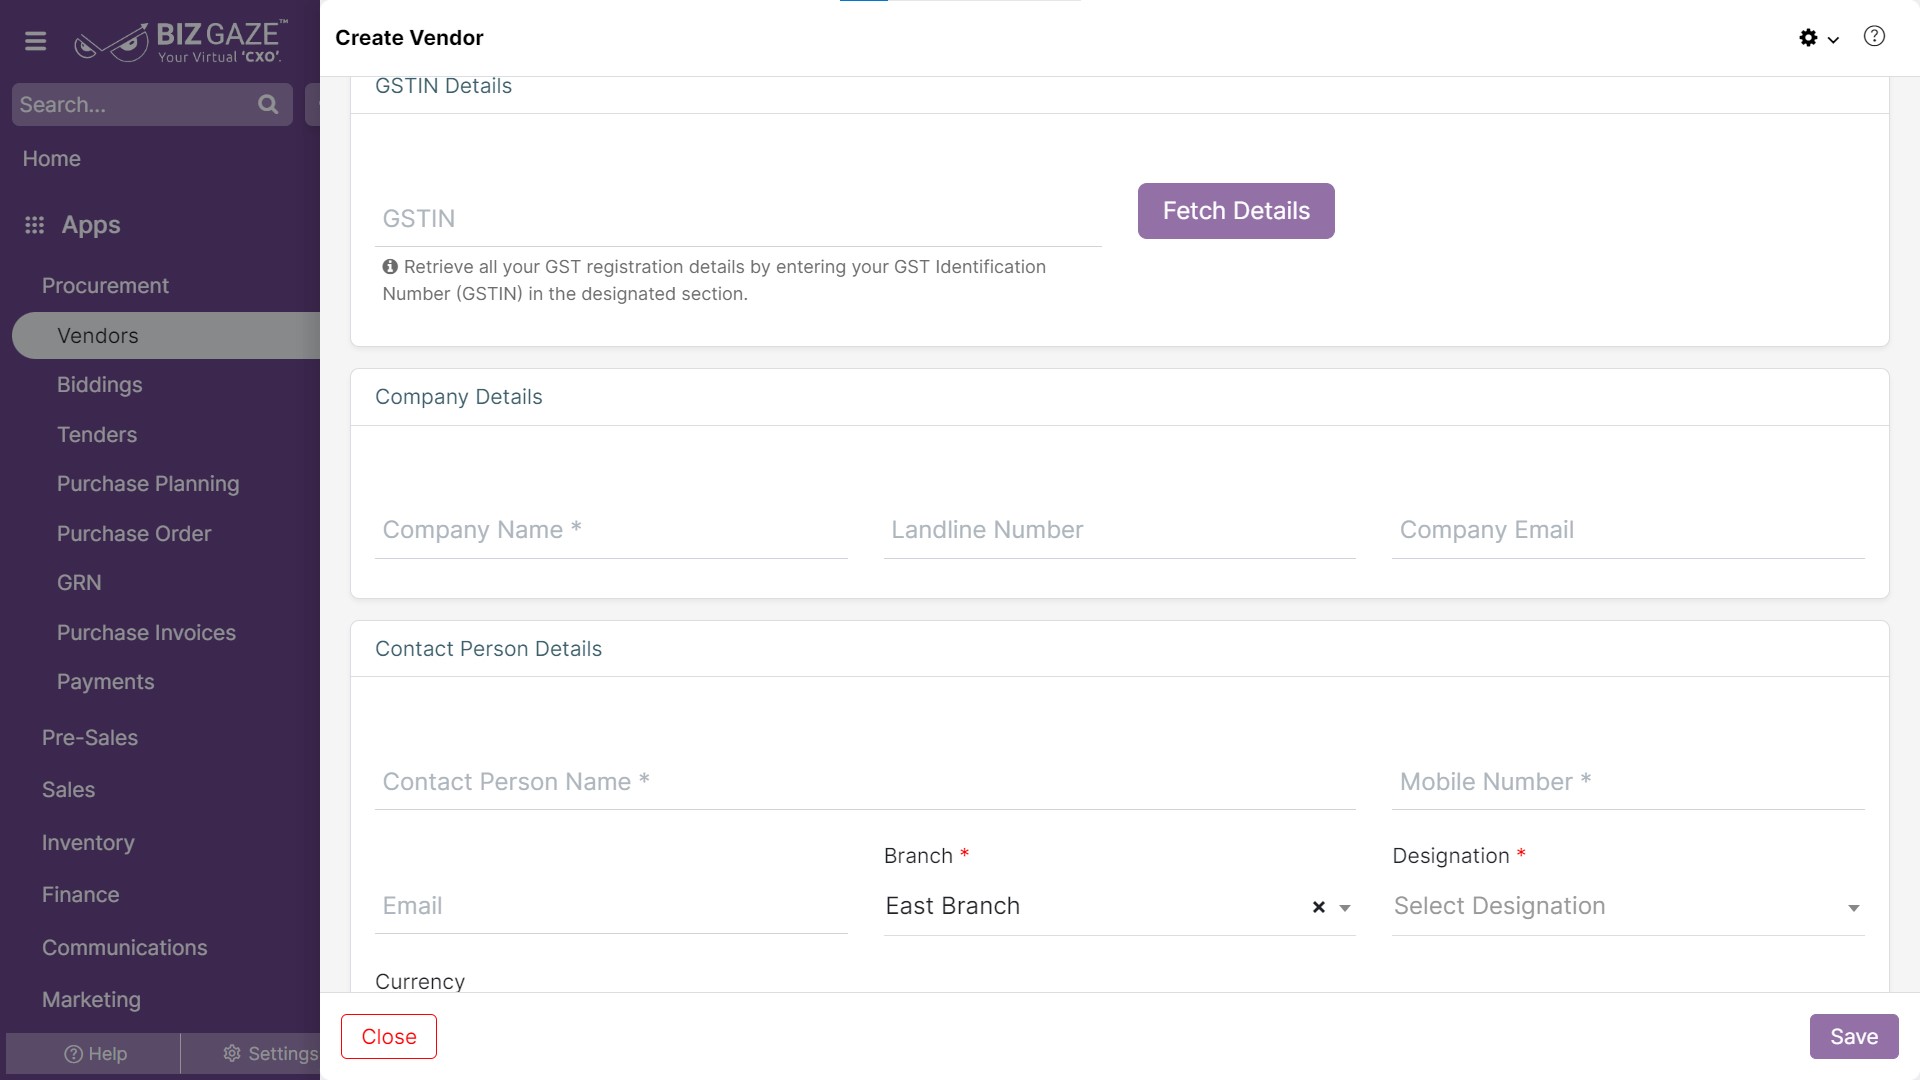
The creation process for Vendors is as follows:
Navigation: Menu >> Vendors App >> Vendor Listview >> Create (+)
The fields which are in star mark (*) are mandatory in the creation screen
| Field Name | Field Description | Mandatory |
| GSTIN Details | ||
| GSTIN No. | Enter the GSTIN number of the organization and click on ‘Fetch Details’ | Yes |
| Field Name | Field Description | Mandatory |
| Company Details | ||
| Company Name | Enter the name of the company | Yes |
| Phone Type | Select the phone type from the list | No |
| Number | Enter the contact phone number. | No |
| Company Email | Enter the company email Id | No |
| Contact Person Details | ||
| Contact Person name | Enter the point of contact person name of the organization. | Yes |
| Designation | Select the designation for the contact person from the list. | Yes |
| Contact Number | Enter the Point of contact person’s mobile number.
Verify: If users click on verify, an OTP will be sent to the given contact mobile number. |
Yes |
| Enter the contact person email Id | No | |
| Currency | Select the currency name from the list | No |
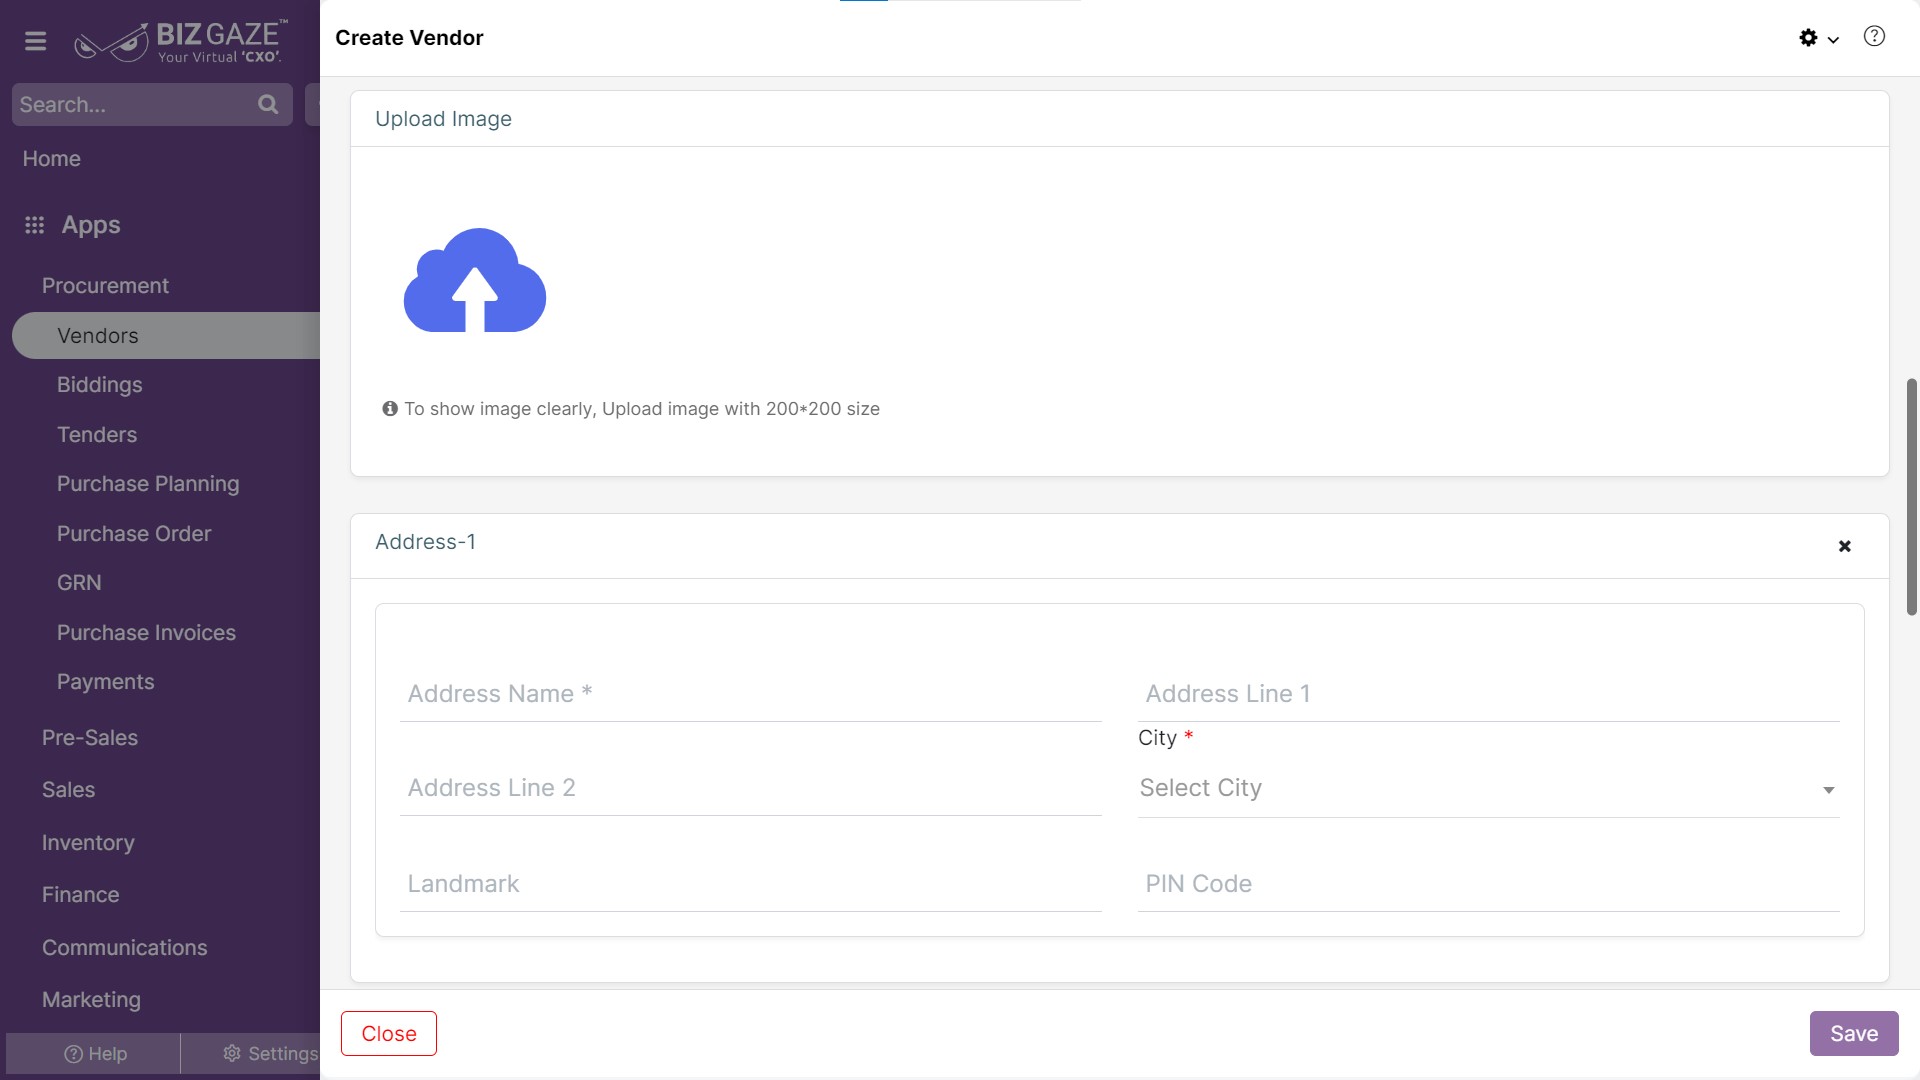
| Upload Image | User can upload an image from the local storage by clicking on the Upload image icon | ||
| Address Details | |||
| Add new Address | Add(+) the required tag for the vendor, users can add multiple addresses by providing following details | No | |
| Address Name: Enter a quick identification name for the address. | Yes | ||
| Pin Code: Enter pin code of the address. | No | ||
| Address Line 1 & 2: Enter the address details. | No | ||
| City: Select the city from the list to the address. | Yes | ||
| Landmark: Enter the landmark for the address to quickly identify. | No | ||
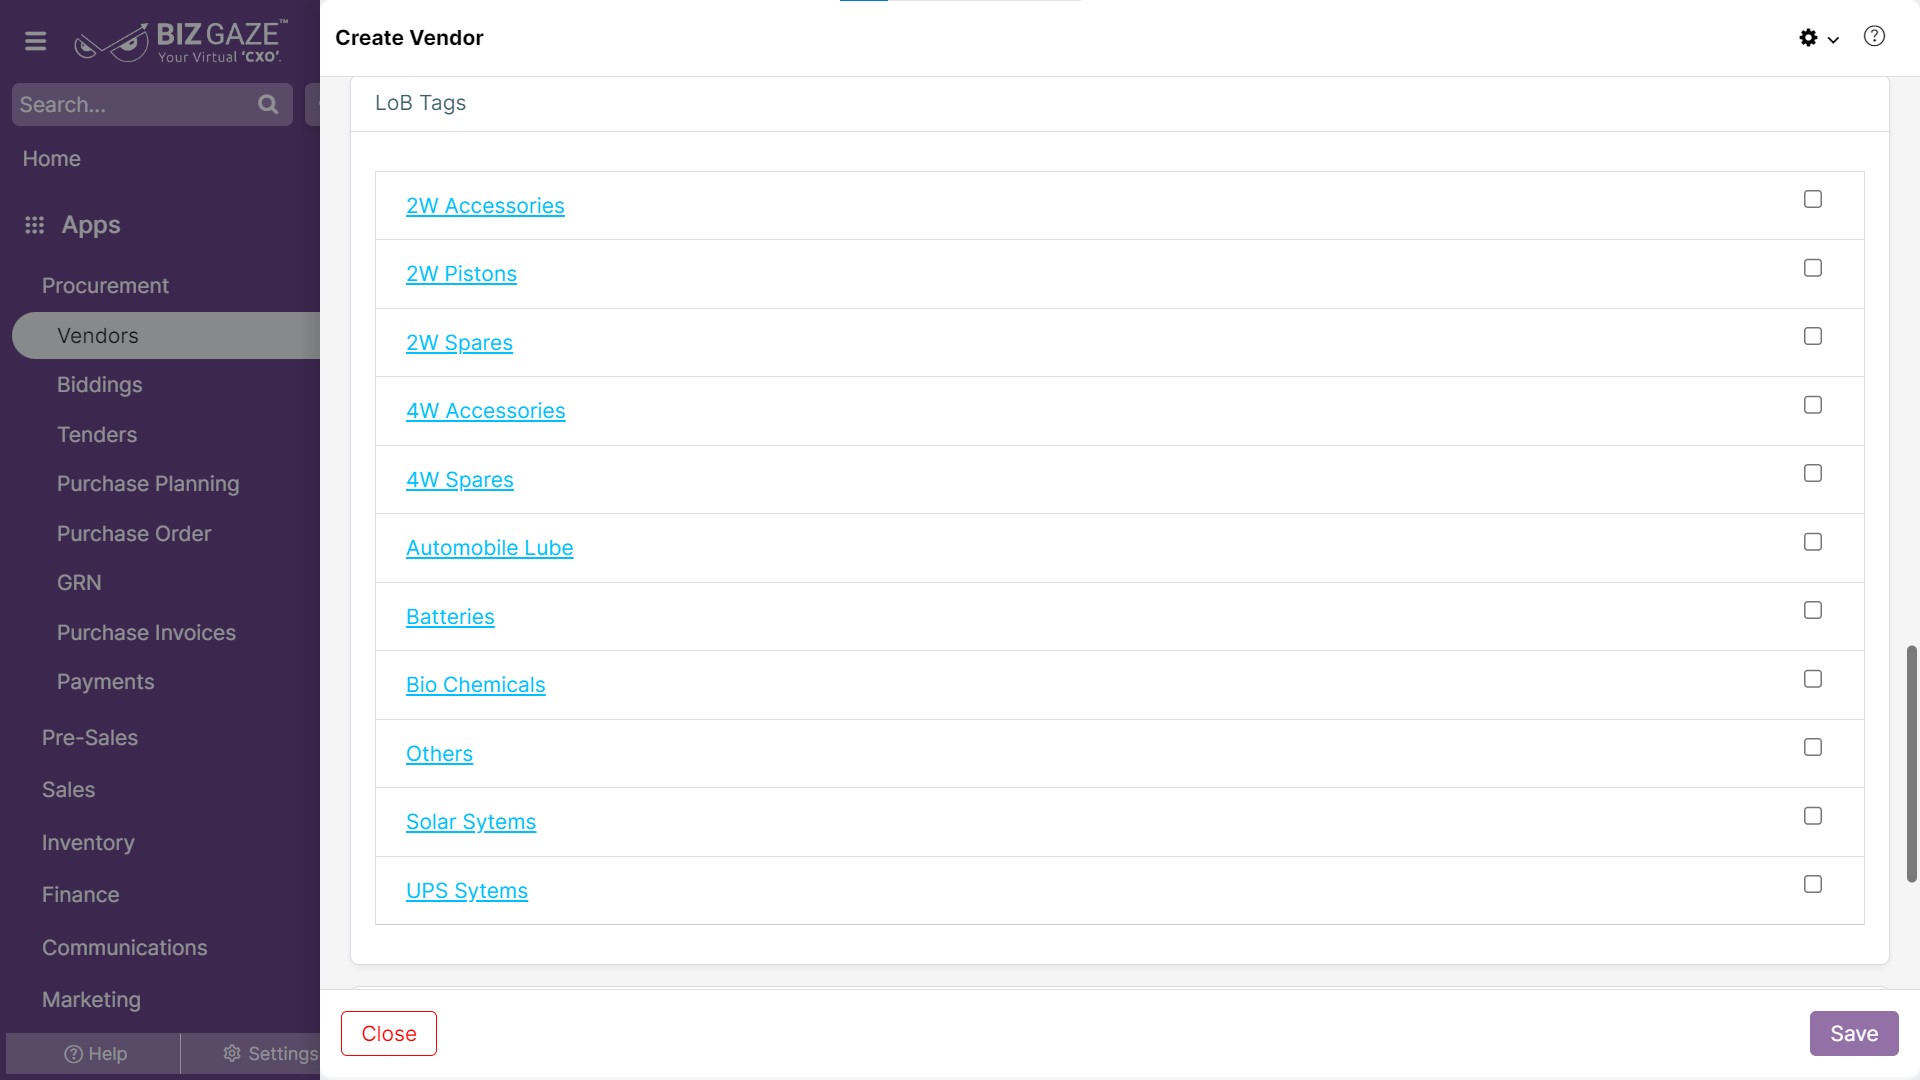
| LoB Tags | Add(+) the required tag for the vendor, users can add multiple LoB tags to the vendor |
Description
User can comment or enter short notes about the Vendor.
Apply all the required changes and click on Save


